1. Introducción
This manual provides detailed instructions for the installation, operation, and maintenance of your WEILAILIFE Outdoor Wired Security Camera System. This system features an integrated 10.1-inch Full HD IPS display, four 5.0MP wired HD-Analog cameras, and a 500GB hard drive for local storage.
The system is designed for comprehensive surveillance, offering features such as PIR motion detection with red and blue flashing LEDs, 122° ultra wide-angle coverage, 90ft night vision, and remote viewing via the "HonestView" app without monthly fees.
2. ¿Qué hay en la caja?
Verifique que todos los componentes estén presentes en el paquete:
- Monitor 8-Channel 5.0MP DVR with Pre-installed 500GB Hard Drive (x1)
- 5.0MP Wired HD-Analog Camera (x4)
- 2-in-1 Cable 60ft for Camera (x4)
- DC12V2A Power Supply for DVR (x1)
- Mando a distancia (x1)
- Cable LAN de 1 m (x1)
- Cable HDMI (x1)
- Ratón USB (x1)
- Separation Power Cord 1-to-4 (x1)
- Screw Kits (x4)
- Manual de usuario (x1)
- Security Sticker (x1)

Figura 2.1: Contenido del paquete
3. Configuración e instalación
3.1 Instalación de la cámara
Follow these steps to install the cameras:
- Marcar agujeros de perforación: Position the camera in the desired location. Use a marker to indicate the positions for drilling the mounting holes.
- Perforación: Taladre agujeros en las posiciones marcadas.
- Inserting Wall Anchors: Insert the provided wall anchors into the drilled holes to ensure a secure fit for the screws.
- Securing the Camera: Align the camera base with the wall anchors and secure it using the provided screws.
Video 3.1: Camera Installation Guide. This video demonstrates the physical installation process of the WEILAILIFE security camera, including marking, drilling, and securing the camera to a wall.
3.2 Conexión DVR
Connect the DVR (Digital Video Recorder) to power, network, and display:
- Conexión de energía: Connect the DC12V2A power supply to the DVR's power input and plug it into an electrical outlet.
- Conexión de red: Connect one end of the LAN cable to the DVR's Ethernet port and the other end to your router.
- Conexión de pantalla: Connect the HDMI cable from the DVR's HDMI output to an HDMI input on your monitor or TV. Alternatively, use a VGA cable for VGA displays.
- Ratón USB: Connect the USB mouse to one of the DVR's USB ports for navigation.
- Conexión de la cámara: Connect each camera to the DVR using the provided 2-in-1 cables. Ensure secure connections for both video (BNC) and power (DC connector). Use the separation power cord if multiple cameras share a single power adapter.
Video 3.2: DVR Connection Setting. This video illustrates the correct wiring and connection procedures for the DVR unit, including power, network, display, and camera inputs.
3.3 Configuración inicial y configuración de la aplicación
After connecting all hardware, power on the DVR. The system will boot up and display on the connected monitor. For remote viewing and advanced settings, download and configure the "HonestView" app:
- Descargar aplicación: Descargue gratis el "HonestView" app from the App Store (iOS) or Google Play Store (Android).
- Agregar dispositivo: Open the app, tap the "+" icon to add a new device.
- Escanear código QR: Scan the QR code displayed on the DVR monitor or located on the DVR unit itself.
- Configuración de la red: Follow the on-screen prompts to complete the network setup.
- Vivir View: Once connected, tap the play button to start live viewing from your cameras.
Video 3.3: CCTV Camera System App Setup. This video guides users through the process of setting up the security camera system with the mobile application, including device pairing and live view activación.
4. Operar el sistema
4.1 Monitoreo en vivo
The integrated 10.1-inch Full HD IPS display provides a clear view of all camera feeds. You can also monitor live footage remotely via the "HonestView" app on your smartphone, PC, or tablet.
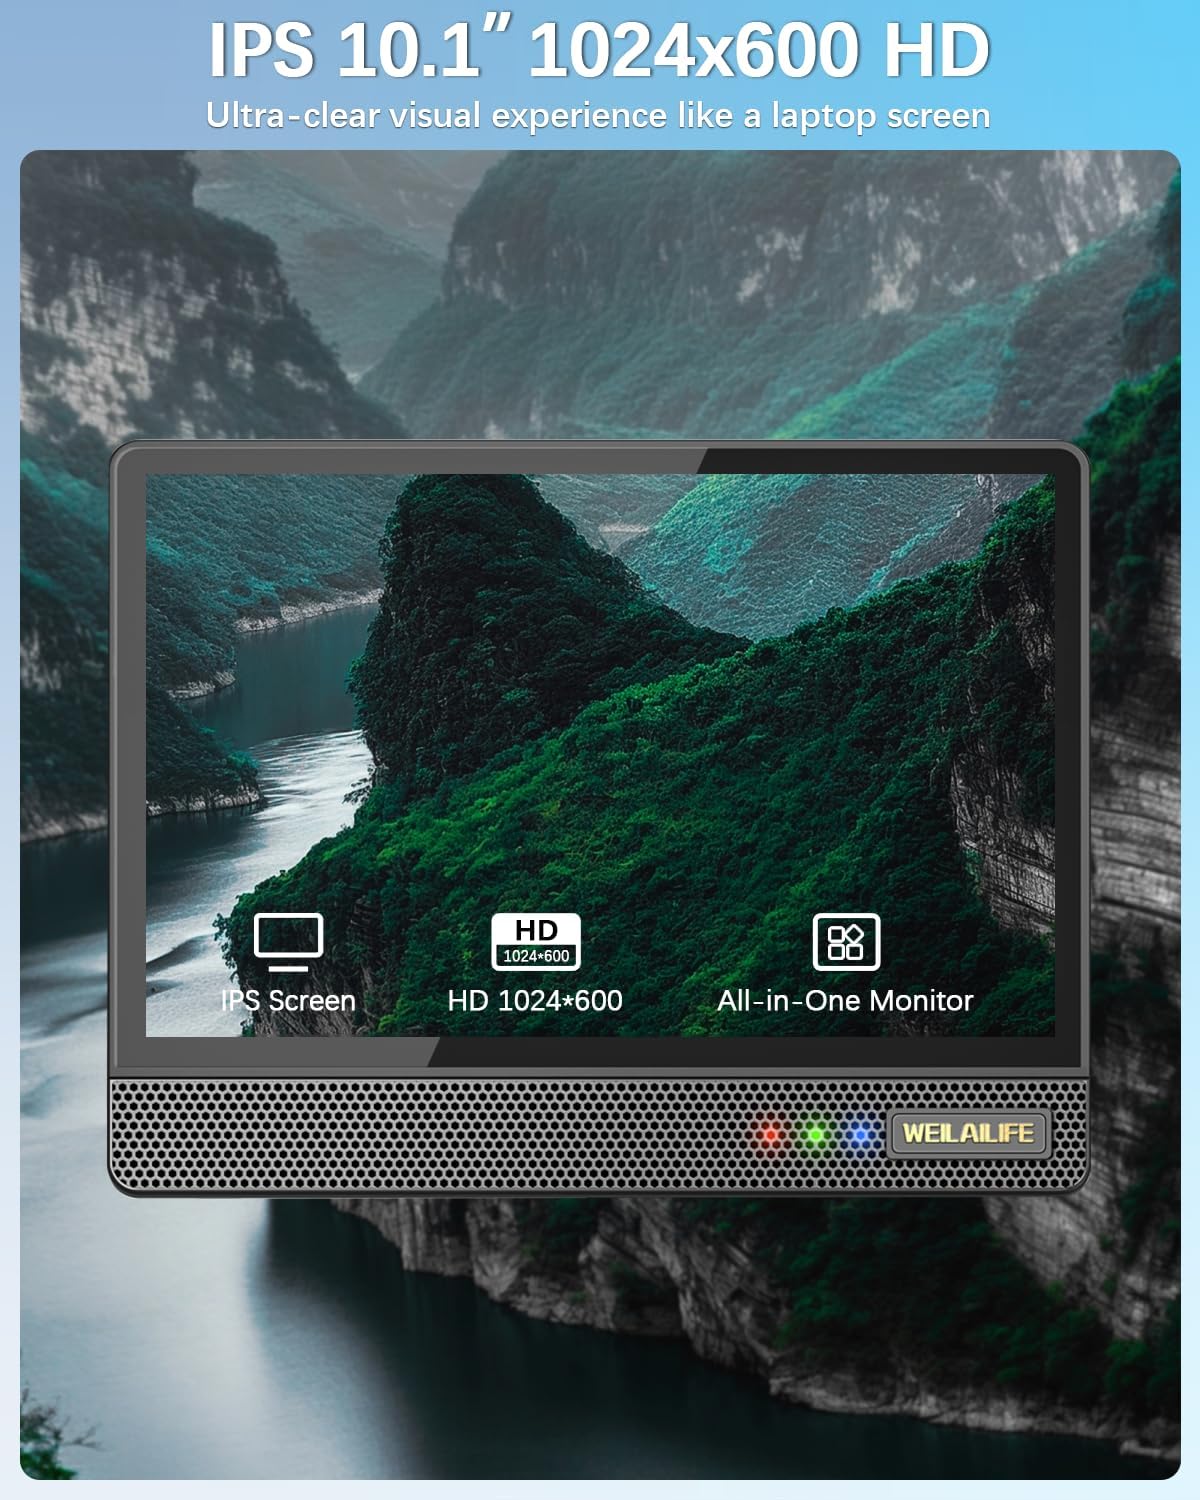
Figure 4.1: 10.1-inch Full HD IPS Monitor Display
4.2 Detección de movimiento y alertas
The system features PIR motion detection. When motion is detected, the cameras activate red and blue flashing LEDs for 15 seconds to deter potential intruders. The system can also send email alerts and app notifications, and trigger recording.
- Personalización: You can customize the motion detection area, sensitivity, and time within the DVR settings or the "HonestView" app.
- Función AI WDR: The AI WDR (Wide Dynamic Range) function enhances image clarity by balancing bright and dark areas in surveillance footage, ensuring details are visible in challenging lighting conditions.

Figure 4.2: Red & Blue Flashing LEDs in Action

Figure 4.3: PIR Motion Detection Zones

Figure 4.4: AI WDR Function
4.3 Modos de grabación
The system supports multiple recording modes to suit your surveillance needs:
- Grabación por detección de movimiento: Graba solo cuando se detecta movimiento, lo que ahorra espacio de almacenamiento.
- Grabación programada: Records continuously during specified time periods.
- Grabación manual: Allows you to start and stop recording manually.

Figura 4.5: Múltiples modos de grabación
4.4 Visión nocturna
The cameras are equipped with 90ft Super Night Vision, utilizing enhanced 2 Array Infrared Light and an Auto IR-Cut Filter for clear black-and-white video even in complete darkness.
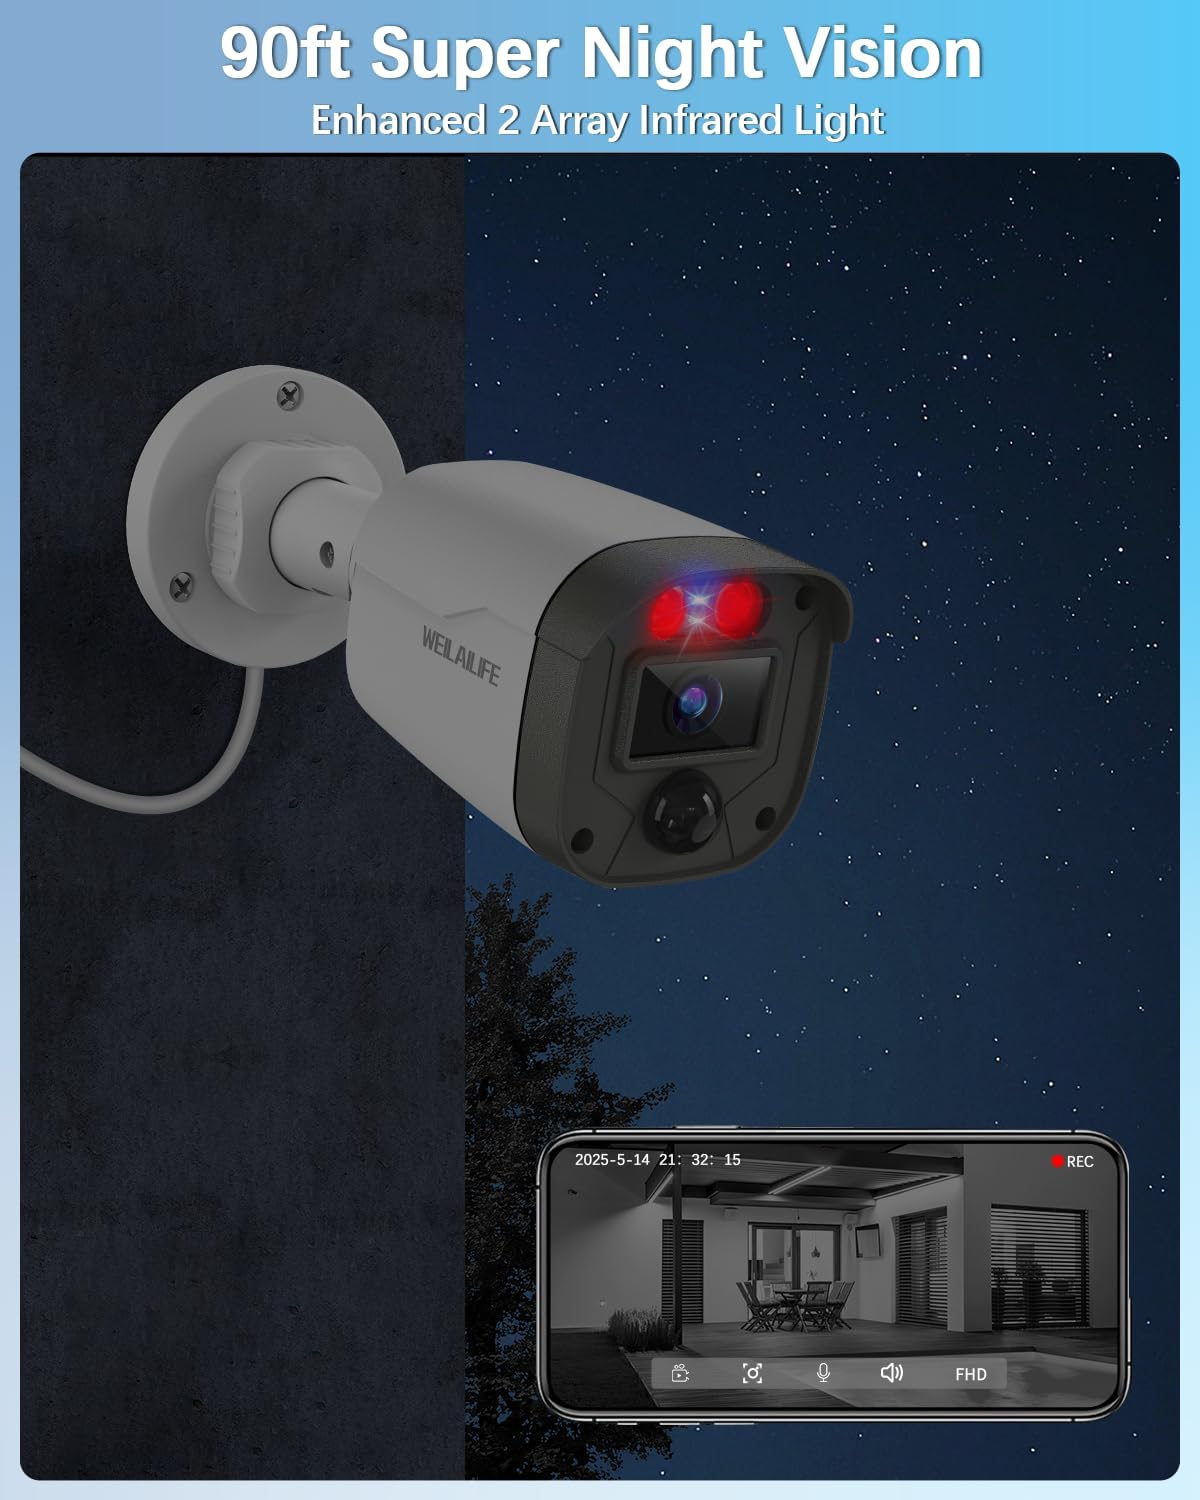
Figure 4.6: 90ft Super Night Vision
4.5 Audio bidireccional
While the product description mentions two-way audio in a customer review, specific details on its operation are not provided in the product features. If available, this feature typically allows you to speak through the camera's speaker and hear audio from the camera's microphone via the mobile app.
5. Mantenimiento
5.1 Resistencia a la intemperie
The outdoor cameras are IP67 waterproof, ensuring reliable operation in various weather conditions including rain, snow, and extreme temperatures ranging from -20°C (-5°F) to 60°C (140°F).

Figura 5.1: Cámara impermeable IP67
5.2 Cuidados generales
- Limpie periódicamente las lentes de la cámara con un paño suave y húmedo.amp Paño para garantizar una calidad de imagen nítida.
- Ensure all cable connections remain secure and free from damage.
- Keep the DVR unit in a well-ventilated area to prevent overheating.
6. Solución de problemas
Esta sección proporciona soluciones a problemas comunes que puede encontrar:
- Sin señal de vídeo: Check all cable connections (power, video, HDMI/VGA) to ensure they are secure. Verify that the cameras are powered on.
- Mala calidad de imagen: Limpie las lentes de la cámara. Asegúrese de que no haya obstrucciones en el campo de visión de la cámara. view. Adjust camera position if necessary.
- La detección de movimiento no funciona: Verify motion detection settings in the DVR or app. Adjust sensitivity and detection areas. Ensure the PIR sensor is not obstructed.
- Remoto ViewProblemas de ing: Check your internet connection and router settings. Ensure the DVR is connected to the network and the "HonestView" app is properly configured and updated.
- DVR no graba: Check hard drive status in DVR settings. Ensure sufficient storage space is available. Verify recording schedules and motion detection settings.
7. Especificaciones
| Característica | Detalle |
|---|---|
| Marca | WEILAILIFE |
| Número de modelo | WE-44500 |
| Tecnología de conectividad | HD-Analog, Wired |
| Resolución de captura de video | 2536 x 1944p, 5.0 Megapixel |
| Características especiales | 10" Full HD IPS Screen, 90ft Night Vision, AI WDR Function, Human Detection, Red & Blue Flashing LEDs |
| Número de canales | 8 (El sistema incluye 4 cámaras) |
| Capacidad de almacenamiento de memoria | 500 GB (Pre-installed) |
| Color | Blanco |
| Fuente de poder | Eléctrico con cable |
| Dimensiones del artículo (largo x ancho x alto) | 13 x 11 x 7 pulgadas |
| Sistema operativo | Linux |
| Usos recomendados | Interior, exterior |
| Dispositivos compatibles | Cámaras, ordenadores personales, teléfonos inteligentes, televisores, tabletas |
| Otras características de la cámara | 122° Wide-Angle, 90ft Super Night Vision, Motion Detection |
| Tecnología con poca luz | Visión nocturna de 90 pies con filtro de corte IR automático y LED infrarrojos |
| Rango de visión nocturna | 90 pies |
| Velocidad de cuadros | 15 fps |
| Modo de grabación | Evento, Horario |
| Puertos USB totales | 2 |
| Interfaz de hardware | HDMI, USB 2.0 |
| Tipo de lente | Gran angular |
| Entrada de vídeo | HD-Analog Cameras, RJ45 |
| Viewángulo de ing | 122 grados |
| Fabricante | WEILAILIFE |
| Compatibilidad con hogares inteligentes | Smart Home Compatible |
| Peso del artículo | 11.05 libras |
8. Garantía y soporte
Specific warranty details are not provided in the product information. Please refer to the warranty card included in your package or contact WEILAILIFE customer support for information regarding warranty coverage and technical assistance.
For customer support, please visit the official WEILAILIFE website or use the contact information provided in your product documentation.


