Introducción
Thank you for choosing the Aiwa FP-30-2G Flip Phone. This manual provides essential information for setting up, operating, and maintaining your device. The FP-30-2G is a reliable 2G mobile phone designed for essential communication, featuring dual SIM support, Bluetooth 3.0, dual displays, an FM radio, and a dedicated SOS button for emergencies.
Please read this manual carefully before using your phone to ensure proper operation and to maximize its lifespan.
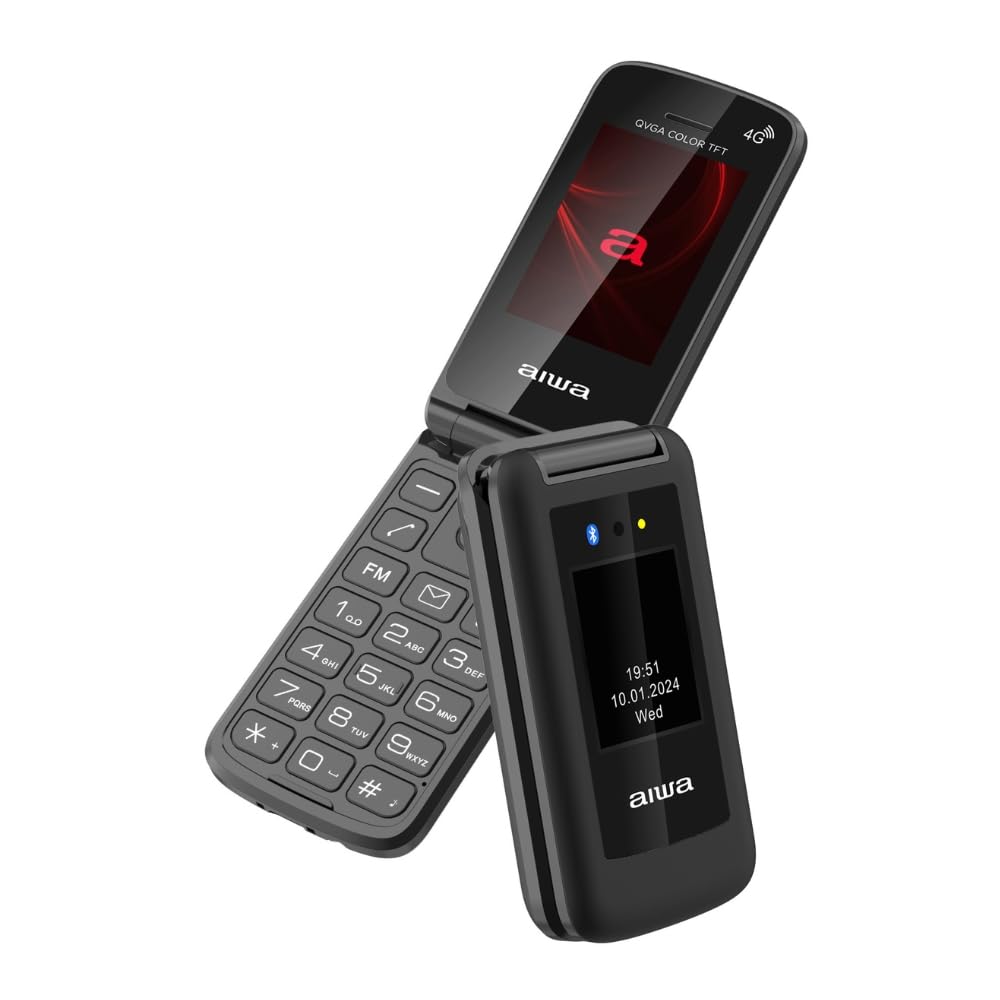
Image: Aiwa FP-30-2G Flip Phone in open position, displaying the main screen and keypad.
1. Configuración
1.1 Contenido del paquete
Asegúrese de que todos los artículos estén presentes en la caja:
- Aiwa FP-30-2G Flip Phone
- Battery (BL-5C 1000mAh)
- Cargador de CA
- Cable USB-C
- Manual de usuario (este documento)
1.2 Instalación de la batería y la tarjeta SIM
- Retire la cubierta posterior: Abra con cuidado la cubierta posterior del teléfono utilizando la muesca provista.
- Insertar tarjeta(s) SIM: The phone supports Dual SIM. Locate the SIM card slots. Insert your 2G compatible SIM card(s) into the designated slots with the gold contacts facing down and the cut corner aligned as shown in the diagram (refer to phone's internal markings).
- Insertar tarjeta MicroSD (opcional): If you wish to expand storage (up to 32GB), insert a MicroSD card into the T-Flash card slot.
- Insertar batería: Place the BL-5C battery into the battery compartment, ensuring the contacts align with the phone's terminals.
- Reemplazar la cubierta trasera: Alinee y presione con cuidado la cubierta posterior hasta que encaje firmemente en su lugar.
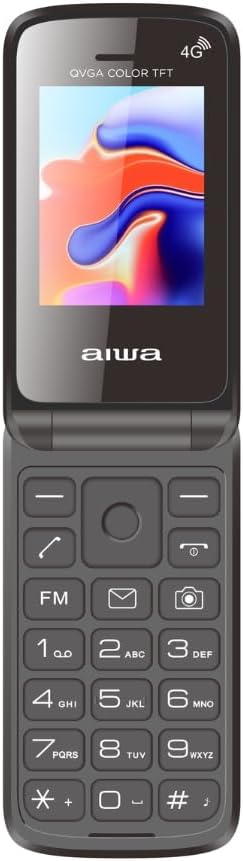
Image: Aiwa FP-30-2G Flip Phone in closed position, front view.
1.3 Carga de la batería
Before first use, fully charge the phone's battery. Use only the provided charger and USB-C cable.
- Connect the USB-C cable to the charging port on the phone.
- Connect the other end of the USB-C cable to the AC charger.
- Conecte el cargador de CA a una toma de corriente.
- El indicador de carga del teléfono mostrará el estado de carga. Una vez cargada por completo, desconecte el cargador.
Nota: The phone has a standby time of up to 180 hours and talk time of up to 4 hours on a full charge.
1.4 Encendido / Apagado
- Para encender: Mantenga presionado el botón de Encendido/Finalizar llamada (generalmente rojo) hasta que la pantalla se ilumine.
- Para apagar: Press and hold the Power/End Call button until the power-off options appear, then select "Power Off" or simply hold until the phone shuts down.
2. Instrucciones de funcionamiento
2.1 Funciones básicas de llamada
- Haciendo una llamada: Introduzca el número de teléfono utilizando el teclado y presione el botón Llamar (generalmente verde).
- Responder una llamada: Cuando suene el teléfono, presione el botón Llamar.
- Terminar una llamada: Presione el botón de Encendido/Finalizar llamada.
- Ajuste del volumen: Use the side volume keys during a call.
2.2 Envío de mensajes SMS
- Vaya al menú "Mensajes".
- Seleccione “Escribir mensaje” o “Nuevo SMS”.
- Introduzca el número del destinatario o selecciónelo entre los contactos.
- Escriba su mensaje usando el teclado alfanumérico.
- Presione "Enviar".
2.3 Dual Displays
The FP-30-2G features two displays:
- Pantalla principal: 2.4-inch (240 x 320 QVGA) screen visible when the phone is open. This is your primary interface.
- Pantalla externa: 1.77-inch (128 x 160) screen visible when the phone is closed. This display shows essential information like time, date, battery status, and incoming call notifications without needing to open the phone.
2.4 Botón de emergencia SOS
El botón SOS dedicado proporciona una forma rápida de comunicarse con números de emergencia preestablecidos.
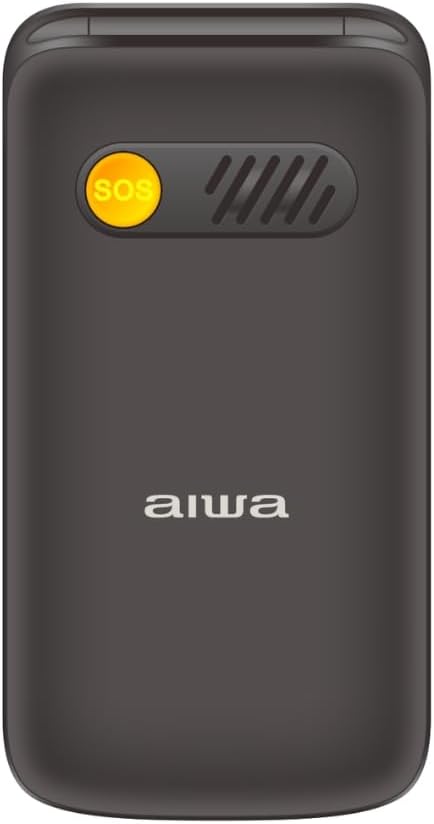
Imagen: Parte posterior view of the Aiwa FP-30-2G Flip Phone, highlighting the yellow SOS button and speaker grille.
- Configuración de números SOS: Navigate to the "SOS Settings" in the phone's menu. Add up to 5 emergency contact numbers.
- Usando el botón SOS: In an emergency, press and hold the SOS button on the back of the phone for a few seconds. The phone will automatically call the pre-set emergency numbers in sequence until one answers. It will also send an emergency SMS message to these contacts.
2.5 Radio FM
The phone includes an offline FM radio. To use it:
- Accede a la aplicación “Radio FM” desde el menú principal.
- You may need to connect wired headphones (not included) to act as an antenna for optimal reception.
- Utilice las teclas de navegación para buscar estaciones o sintonizarlas manualmente.
2.6 bluetooth 3.0
Conecte su teléfono a auriculares Bluetooth u otros dispositivos compatibles.
- Vaya a “Configuración” > “Bluetooth”.
- Encienda el Bluetooth.
- Seleccionar "Buscar dispositivos" o "Emparejar nuevo dispositivo".
- Select your desired device from the list and follow the on-screen prompts to pair.
2.7 Cámara y linterna
- Cámara: The phone features a 0.3 MP rear camera with flash. Access it from the main menu to take basic photos or QVGA videos.
- Flash: A built-in LED flashlight is available. It can usually be activated quickly by pressing and holding a specific key (refer to your phone's quick access keys, often the '0' or a dedicated side button) or through the utilities menu.
3. Mantenimiento
3.1 Limpieza del dispositivo
- Use a soft, dry, lint-free cloth to clean the phone's exterior and screen.
- Do not use liquid cleaners, aerosols, or harsh chemicals, as these can damage the phone.
- Mantenga el puerto de carga libre de polvo y residuos.
3.2 Cuidado de la batería
- Evite exponer la batería a temperaturas extremas (calor o frío).
- No perfore, desmonte ni modifique la batería.
- Si no va a utilizar el teléfono durante un período prolongado, cargue la batería hasta aproximadamente el 50 % antes de guardarlo.
- Replace the battery if you notice a significant decrease in performance or swelling.
3.3 Cuidados generales
- Protege el teléfono de caídas e impactos.
- Keep the phone dry. Moisture can damage internal components.
- Do not attempt to repair the phone yourself. Refer to qualified service personnel.
4. Solución de problemas
If you encounter issues with your Aiwa FP-30-2G, try the following solutions before seeking professional assistance.
| Problema | Posible solución |
|---|---|
| El teléfono no se enciende |
|
| Sin señal de red |
|
| La batería no se carga |
|
| El botón SOS no funciona |
|
| Cannot hear FM radio |
|
5. Especificaciones
Detailed technical specifications for the Aiwa FP-30-2G:
| Característica | Detalle |
|---|---|
| Número de modelo | FP-30-2G |
| Bandas de red | GSM 850/900/1800/1900Mhz (2G) |
| Bluetooth | 3.0 + EDR |
| Pantalla principal | 2.4 inches, 240 x 320 QVGA, TN Type |
| Pantalla externa | 1.77 inches, 128 x 160, TN Type |
| Cámara | 0.3 MP con flash |
| Memoria interna | 32MB + 32MB |
| Memoria expandible | T-Flash Card Slot, up to 32GB |
| Soporte de tarjeta SIM | Doble SIM |
| Batería | BL-5C, 1000mAh (Removable) |
| Tiempo de espera | Hasta 180 horas |
| Tiempo de conversación | Hasta 4 horas |
| Cargador | 5V, 500mA with USB-C cable |
| Dimensiones (cerrado) | 103 x 53.5 x 21.05 mm |
| Peso (con batería) | 106 gramos |
| Sistema operativo | Symbian 9.1 (as per specifications, though this is unusual for a modern feature phone) |
| Reproductor de audio | AMR, MID, MP3, WAV |
| Reproductor de video | 3GP, MP4, AVI |
| Otras características | FM Radio, Torchlight, Vibration System, QVGA Video Recorder, Sound Recorder, SMS, Phonebook (500 contacts), Calendar, Calculator, Alarm, Speed Dial (M1/M2/M3), Photo Contacts |

Imagen: Lateral view of the Aiwa FP-30-2G Flip Phone, showing its compact profile.
6. Garantía y soporte
Your Aiwa FP-30-2G Flip Phone comes with a standard manufacturer's warranty. Please refer to the warranty card included in your package for specific terms and conditions, including the warranty period and coverage details.
For technical support, service, or warranty claims, please contact Aiwa customer service through their official website or the contact information provided in your warranty documentation. Do not attempt to open or repair the device yourself, as this may void your warranty.
Conserve su recibo de compra como comprobante de compra para fines de garantía.


