1. Introducción
This manual provides detailed instructions for the assembly, operation, maintenance, and troubleshooting of your Domi 8x8FT Hardtop Gazebo. Please read this manual thoroughly before beginning assembly or use to ensure proper installation and safe operation. Keep this manual for future reference.
2. Información de seguridad
Instrucciones de seguridad importantes:
- Asegúrese de que todos los componentes estén presentes y sin daños antes del montaje. No continúe con el montaje si alguna pieza falta o está dañada.
- Assembly requires at least two adults. Some steps may require additional assistance.
- Utilice equipo de seguridad adecuado, como guantes, durante el montaje para evitar lesiones.
- Choose a level and stable surface for installation. Secure the gazebo to the ground using appropriate anchoring methods (stakes not included).
- No cuelgue objetos pesados del marco o del techo del mirador.
- Regularly inspect the gazebo for loose connections, damage, or wear. Address any issues promptly.
- In conditions of heavy snow, strong winds, or extreme weather, it is recommended to remove snow from the roof and secure or temporarily disassemble the curtains and netting to prevent damage.
- Mantenga a los niños y las mascotas alejados del área de reunión.
3. Contenido del paquete
Your Domi 8x8FT Hardtop Gazebo package includes the following main components. Refer to the detailed parts list provided in your separate assembly guide for specific quantities and part numbers.
- Componentes del marco de aluminio (postes, vigas, conectores)
- Paneles de techo dobles de acero galvanizado
- Conjunto de cortina
- Conjunto de red
- Hardware Kit (bolts, screws, washers, tools)
- Manual de instrucciones
4. Configuración y montaje
Assembly of the Domi 8x8FT Hardtop Gazebo requires careful attention to detail. All parts are labeled for easier identification. It is recommended to have at least two people for assembly, with additional assistance for roof installation.
4.1 Lista de verificación previa al montaje
- Unpack all boxes and verify that all parts are present against the parts list.
- Despeje un área amplia y nivelada para el ensamblaje.
- Gather necessary tools (e.g., Allen key, wrench, step ladder, work gloves). An Allen key drill bit can significantly speed up assembly.
4.2 Pasos de montaje (Instrucciones generales)view)
Follow the detailed step-by-step instructions provided in your separate assembly guide. The following is a general sequence:
- Ensamblar el marco base: Connect the horizontal beams to the vertical posts to form the base structure.
- Instalación de vigas de soporte del techo: Attach the upper roof support beams to the main frame.
- Fijar los paneles del techo: Carefully install the galvanized steel roof panels. Ensure proper alignment and secure all fasteners. The double-roof design allows for air circulation.
- Instalar cortinas y redes: Attach the multi-functional curtains and netting to the designated tracks or hooks on the frame.
- Fijar a tierra: Anchor the gazebo posts to the ground using appropriate stakes or bolts through the pre-drilled holes in the base plates.

Figure 4.2.1: Dimensions of the Domi 8x8FT Gazebo. This diagram illustrates the overall height, width, and depth, including the post dimensions and roof overhangs.

Figure 4.2.2: Installation instructions diagram showing various views and measurements for assembly.

Figura 4.2.3: Primer plano view of the stable anchoring stands at the base of the gazebo posts, showing pre-drilled holes for securing to the ground.
5. Instrucciones de funcionamiento
5.1 Using Curtains and Netting
The gazebo is equipped with multi-functional curtains and netting for various uses:
- Protección de la privacidad: Close the curtains completely for enhanced privacy.
- Protección contra insectos: Close the netting to keep insects out while allowing airflow.
- Full Airflow: Tie back both curtains and netting to the posts for maximum openness and airflow.
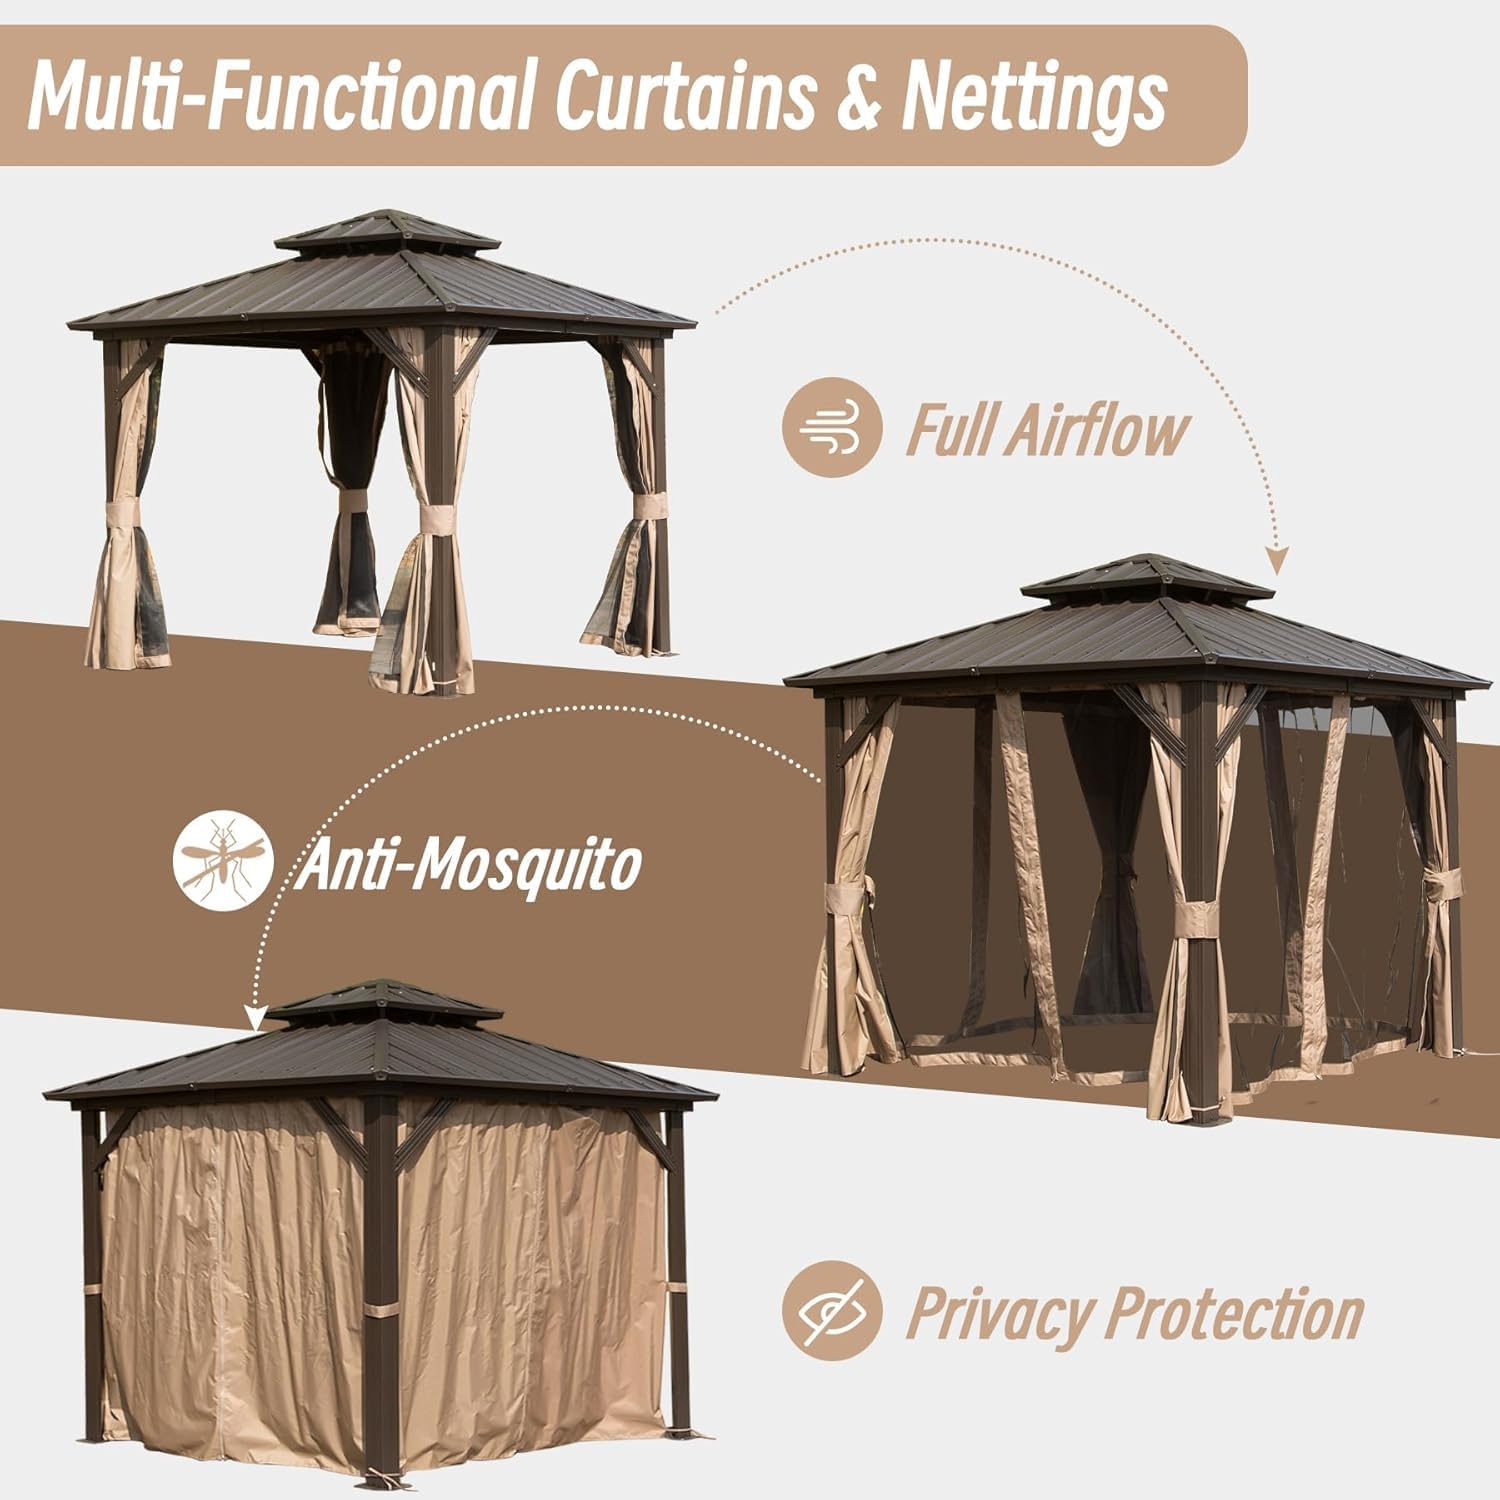
Figure 5.1.1: Illustration of the multi-functional curtains and nettings in various configurations: tied back for full airflow, closed for anti-mosquito protection, and fully closed for privacy.
5.2 Ceiling Hook Usage
A convenient ceiling hook is integrated into the center of the gazebo roof. This hook can be used to hang lightweight items such as decorative lights or a small fan.

Figura 5.2.1: Primer plano view of the central ceiling hook, indicating its use for hanging a fan, light, or other decorations.
6. Mantenimiento
El mantenimiento regular prolongará la vida útil y la apariencia de su mirador.
- Limpieza del marco: Limpie el marco de aluminio con un paño suave, agua y jabón neutro. Enjuáguelo bien y séquelo para evitar manchas de agua. Evite los limpiadores abrasivos.
- Limpieza del techo: The galvanized steel roof can be cleaned with a soft brush or cloth and water. The slope drainage system helps prevent water accumulation.
- Limpieza de cortinas y mosquiteras: Follow the care instructions on the fabric labels. Typically, these can be spot cleaned or gently hand washed. Ensure they are completely dry before storing or reattaching to prevent mildew.
- Inspección de hardware: Revise periódicamente todos los pernos y tornillos para asegurarse de que estén bien apretados. Vuelva a apretarlos si es necesario.
- Winterización: In areas with heavy snowfall, it is recommended to remove accumulated snow from the roof to prevent structural stress. Consider removing curtains and netting for storage during winter months to protect them from harsh elements.

Figure 6.1.1: Illustration showing the enhanced slope drainage design of the roof, which efficiently drains rainwater and prevents accumulation.
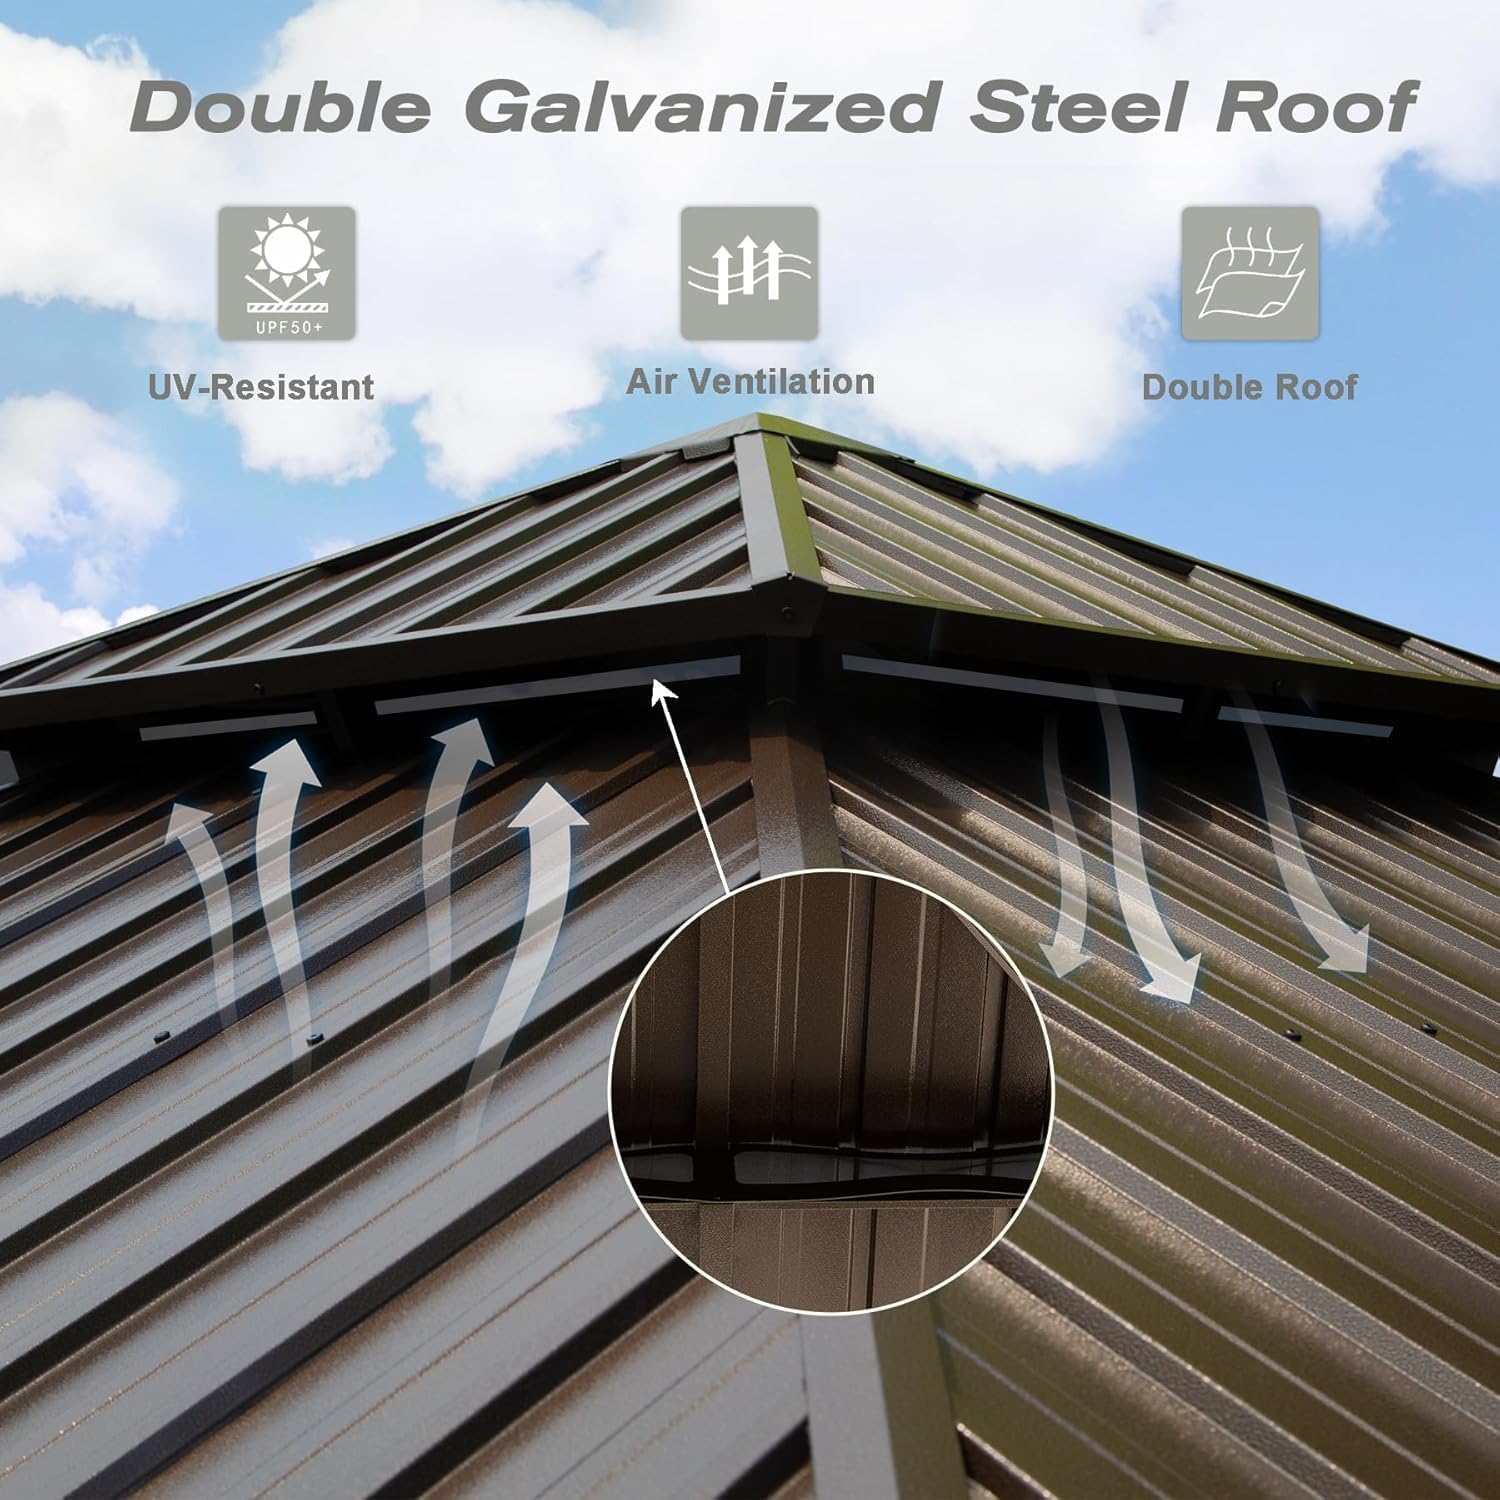
Figure 6.1.2: Detail of the double galvanized steel roof, highlighting its UV-resistant properties, air ventilation system, and double-roof construction.
7. Solución de problemas
Si tiene problemas con su gazebo, consulte los siguientes problemas y soluciones comunes:
| Problema | Posible causa | Solución |
|---|---|---|
| El gazebo se siente inestable o tambaleante. | Conexiones sueltas; terreno irregular; anclaje insuficiente. | Ensure all bolts and screws are tightened. Verify the installation surface is level. Securely anchor the gazebo to the ground. |
| Acumulación de agua en el techo. | Improper roof panel installation; debris blocking drainage. | Recheck roof panel alignment and ensure they are correctly seated to utilize the slope drainage. Clear any leaves or debris from the roof and drainage channels. |
| Curtains/Netting do not hang properly or fall out. | Incorrect installation; damaged hooks/tracks. | Ensure curtains and netting are correctly attached to the designated tracks or hooks as per the assembly guide. Inspect hooks and tracks for damage. |
| Piezas faltantes o dañadas al llegar. | Daño en el envío o error de embalaje. | Contact Domi customer service immediately with your purchase details and a description of the issue. |
8. Especificaciones
| Característica | Detalle |
|---|---|
| Marca | domi vida al aire libre |
| Número de modelo | LGMF-1654-5-BR |
| Dimensiones del producto | 93.72" de largo x 93.72" de ancho x 108.24" de alto (espacio de 8' x 8') |
| Peso del artículo | 211 libras |
| Material del marco | Alloy Steel, Aluminum (Rustproof) |
| Material del techo | Galvanized Steel (Double Roof) |
| Nivel de resistencia al agua | Impermeable |
| Protección UV | 99% resistente a los rayos UV, UPF 50+ |
| Color | Marrón |
| Requiere ensamblaje | Sí |
| Accesorios incluidos | Curtains, Netting |
9. Garantía y atención al cliente
Domi outdoor living provides customer service and is available to answer any questions or problems you may have regarding your gazebo. For assistance with assembly, missing parts, or any product concerns, please contact our customer support team. Domi also provides additional protection and coverage in the event of any flaws or concerns.
Refer to your purchase documentation or the Domi outdoor living webSitio para conocer los términos de garantía específicos y la información de contacto.


