1. Producto terminadoview
This manual provides instructions for the OLIGHT Oclip Pro and Oclip Ultra Everyday Carry (EDC) Flashlight Clip-on Light Bundle. These compact and versatile lighting tools are designed for various daily tasks and outdoor activities.

Image 1: The OLIGHT Oclip Pro (top, with American flag design) and Oclip Ultra (bottom, olive green) clip-on flashlights.
Oclip Pro Features:
- Three lighting solutions: 500 lumen floodlight, 120-meter spotlight, and 40/4 lumen red light.
- User-friendly interface with a selector switch for mode changes.
- Integrated battery level indicator.
- Compact and lightweight design (1.87 oz / 53 g, 2.24 in / 57 mm length).
Oclip Ultra Features:
- Three-in-one functionality: 530 lumen floodlight, 130-meter spotlight, and 800 mW UV light.
- Constructed from O-aluminum for enhanced durability and wear resistance.
- Compact and lightweight design (1.05 oz / 30 g, 1.90 in / 48.5 mm length).
2. Configuración
2.1 Carga inicial
Before first use, fully charge your Oclip Pro and Oclip Ultra flashlights. Both models feature a USB-C charging port.
- Localice el puerto de carga USB-C en el costado de la linterna.
- Connect a USB-C cable to the flashlight and the other end to a compatible USB power source (e.g., computer, wall adapter).
- The battery indicator will show charging status. Refer to the operating section for indicator details.
- Una vez cargada por completo, desconecta el cable.

Image 2: The OLIGHT Oclip Pro, illustrating its compact size, clip mechanism, and the USB-C charging port.
2.2 Colocación del clip
Both Oclip Pro and Oclip Ultra are designed with an integrated clip for easy attachment to various items.
- Identify the desired attachment point (e.g., pocket, backpack strap, hat brim).
- Gently open the clip by pressing the top part away from the body.
- Slide the clip onto the material until it is securely fastened.
- Ensure the flashlight is stable and will not easily detach during use.

Image 3: A hand demonstrating the robust clip mechanism of the OLIGHT Oclip Pro, highlighting its secure attachment capability.
3. Instrucciones de funcionamiento
3.1 Encendido y apagado
To turn the flashlight on or off, press and hold the main power button located on the side of the device.
3.2 Mode Switching (Oclip Pro)
The Oclip Pro features a selector switch for cycling through its various lighting modes:
- Luz de inundación: Provides a wide beam for general area illumination (up to 500 lumens).
- Destacar: Offers a focused beam for long-range visibility (up to 120 meters).
- Luz roja: Preserves night vision and is suitable for low-light situations (40/4 lumens).
To switch modes, toggle the selector switch. The flashlight will cycle through the available modes in a predetermined order.

Imagen 4: Ejemplo visualamples of the OLIGHT Oclip Pro's floodlight for daily routines, spotlight for focused tasks, and red light for preserving night vision.
3.3 Mode Switching (Oclip Ultra)
The Oclip Ultra combines three distinct lighting functions:
- Luz de inundación: Delivers wide-area illumination (up to 530 lumens).
- Destacar: Provides a concentrated beam for extended reach (up to 130 meters).
- Luz ultravioleta: An 800 mW pure 365nm UV light for specialized inspections (e.g., currency verification, stain detection).
To switch modes, toggle the selector switch. The flashlight will cycle through the available modes.

Image 5: The OLIGHT Oclip Ultra showcasing its floodlight for wide-area illumination, spotlight for long-range visibility, and UV light for specialized inspections.
3.4 Indicador de batería
Both models feature a battery indicator, typically located in the center of the switch, to display the current battery level. Consult the product packaging or official OLIGHT website for specific indicator light meanings (e.g., green for high, yellow for medium, red for low).
4. Mantenimiento
4.1 Limpieza
Para mantener un rendimiento y una apariencia óptimos:
- Limpie el cuerpo de la linterna con un paño suave.amp paño.
- Evite utilizar limpiadores abrasivos o disolventes, ya que pueden dañar el acabado.
- Keep the lens clean for clear light output. Use a lens cloth if necessary.
4.2 Carga
Regular charging is essential to ensure your flashlight is ready when needed. Charge the device when the battery indicator shows a low level.
- Use the provided USB-C cable or a compatible high-quality USB-C cable.
- Avoid over-discharging the battery, as this can reduce its lifespan.
- Store the flashlight with a partial charge if it will not be used for an extended period.
4.3 Material Durability (Oclip Ultra)
The Oclip Ultra is constructed with O-aluminum, an exclusive OLIGHT aluminum alloy. This material offers superior hardness and wear resistance compared to standard 6061 aluminum, ensuring long-term durability even with daily use and accidental drops.
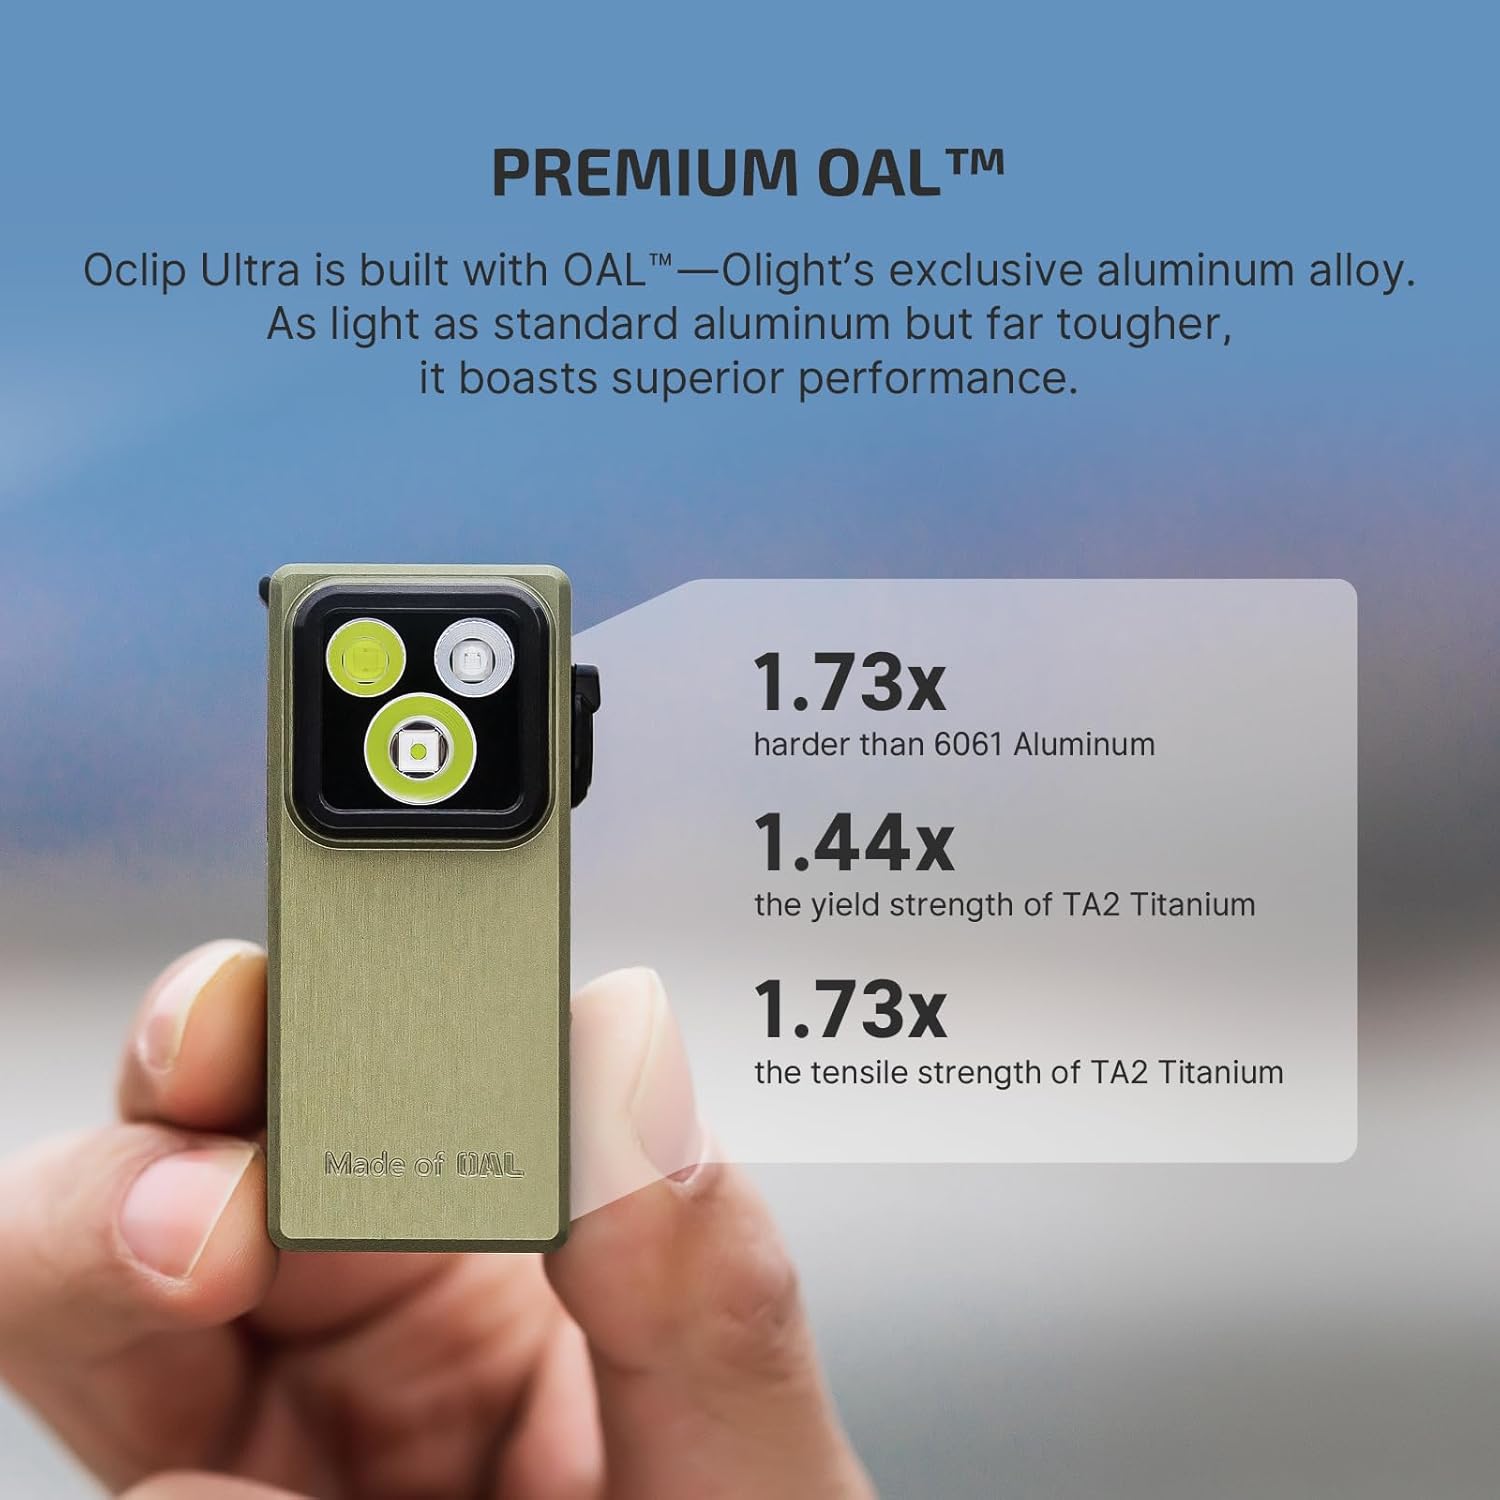
Image 6: The OLIGHT Oclip Ultra, emphasizing its construction from O-aluminum, which is significantly harder and stronger than standard aluminum alloys.
5. Solución de problemas
If you encounter issues with your OLIGHT Oclip flashlight, refer to the following common troubleshooting steps:
5.1 La linterna no se enciende
- Compruebe el nivel de la batería: Ensure the flashlight is sufficiently charged. Connect it to a power source and observe the battery indicator.
- Cable/adaptador de carga: Verify that the USB-C cable and power adapter are functioning correctly. Try a different cable or adapter.
- Operación del botón: Ensure you are pressing and holding the power button correctly.
5.2 Light Output is Dim or Flickering
- Recarga la batería: Low battery can cause dimming or flickering. Fully recharge the device.
- Lente limpia: A dirty lens can obstruct light. Clean the lens gently with a soft cloth.
- Factores ambientales: Extreme cold can temporarily affect battery performance. Allow the flashlight to warm up if used in very cold conditions.
5.3 Clip Not Holding Securely
- Espesor del material: Ensure the material you are clipping to is within the appropriate thickness range for the clip.
- Clip Condition: Inspect the clip for any signs of damage or deformation.
If these steps do not resolve the issue, please contact OLIGHT customer support for further assistance.
6. Especificaciones
Below are the detailed specifications for the OLIGHT Oclip Pro and Oclip Ultra flashlights:

Image 7: A visual comparison detailing the dimensions, weight, and key features of the OLIGHT Oclip Pro and Oclip Ultra.
Oclip Pro Specifications:
| Característica | Detalle |
|---|---|
| Salida máxima (reflector) | 500 lúmenes |
| Max Throw (Spotlight) | 120 metros |
| Salida de luz roja | 40/4 lúmenes |
| Peso | 1.87 onzas/53 gramos |
| Longitud | 2.24 en / 57 mm |
| Ancho | 1.10 en / 28.05 mm |
| Opciones de iluminación | Floodlight, Spotlight, Red Light |
Oclip Ultra Specifications:
| Característica | Detalle |
|---|---|
| Salida máxima (reflector) | 530 lúmenes |
| Max Throw (Spotlight) | 130 metros |
| Salida de luz ultravioleta | 800 mW (365nm) |
| Peso | 1.05 onzas/30 gramos |
| Longitud | 1.90 en / 48.5 mm |
| Ancho | 0.82 en / 21 mm |
| Material | O-aluminum |
| Opciones de iluminación | Floodlight, Spotlight, UV Light |

Image 8: The OLIGHT Oclip Ultra securely clipped to a backpack strap, demonstrating its practical application and light output.
7. Garantía y soporte
For warranty information and customer support, please refer to the official OLIGHT webSitio web o contacte directamente con el servicio de atención al cliente. Conserve su recibo de compra como comprobante para reclamaciones de garantía.
Oficial de OLIGHT Websitio: www.olightstore.com


