Introducción
This manual provides detailed instructions for the safe and efficient operation of your Xiaomi Portable Electric Air Compressor 2 Pro. Please read this manual thoroughly before using the product and retain it for future reference. This device is designed for inflating tires on cars, motorcycles, bicycles, and balls, offering a convenient and portable solution for maintaining optimal pressure.
Información de seguridad
Advertencia: El incumplimiento de estas instrucciones de seguridad puede provocar una descarga eléctrica, un incendio o lesiones graves.
- Mantenga el dispositivo fuera del alcance de los niños.
- No opere el compresor en condiciones húmedas o cerca de líquidos o gases inflamables.
- Ensure the air hose is securely connected to the valve before starting inflation.
- Do not over-inflate items. Always refer to the recommended pressure for the item being inflated. The auto shut-off feature helps prevent over-inflation.
- Evite el uso continuo prolongado para evitar el sobrecalentamiento. Deje que el dispositivo se enfríe si se calienta.
- Utilice únicamente el cable de carga proporcionado y un adaptador de corriente 5 V/3 A compatible para cargar.
- Do not disassemble or modify the device. Contact customer support for repairs.
Contenido del paquete
Verifique que todos los artículos estén presentes en el paquete:
- Compresor de aire eléctrico portátil Xiaomi 2 Pro
- Fast-connecting air valve
- High-pressure air hose extension
- Needle valve (for balls)
- Presta valve adapter (for some bicycle tires)
- Cable de carga tipo C
- Bolsa de almacenamiento

Figure 1: Included accessories with the air compressor.
Producto terminadoview
The Xiaomi Portable Electric Air Compressor 2 Pro is a compact and powerful inflation device. It features a digital LED display, multiple preset modes, and a long-lasting rechargeable battery for convenient use.
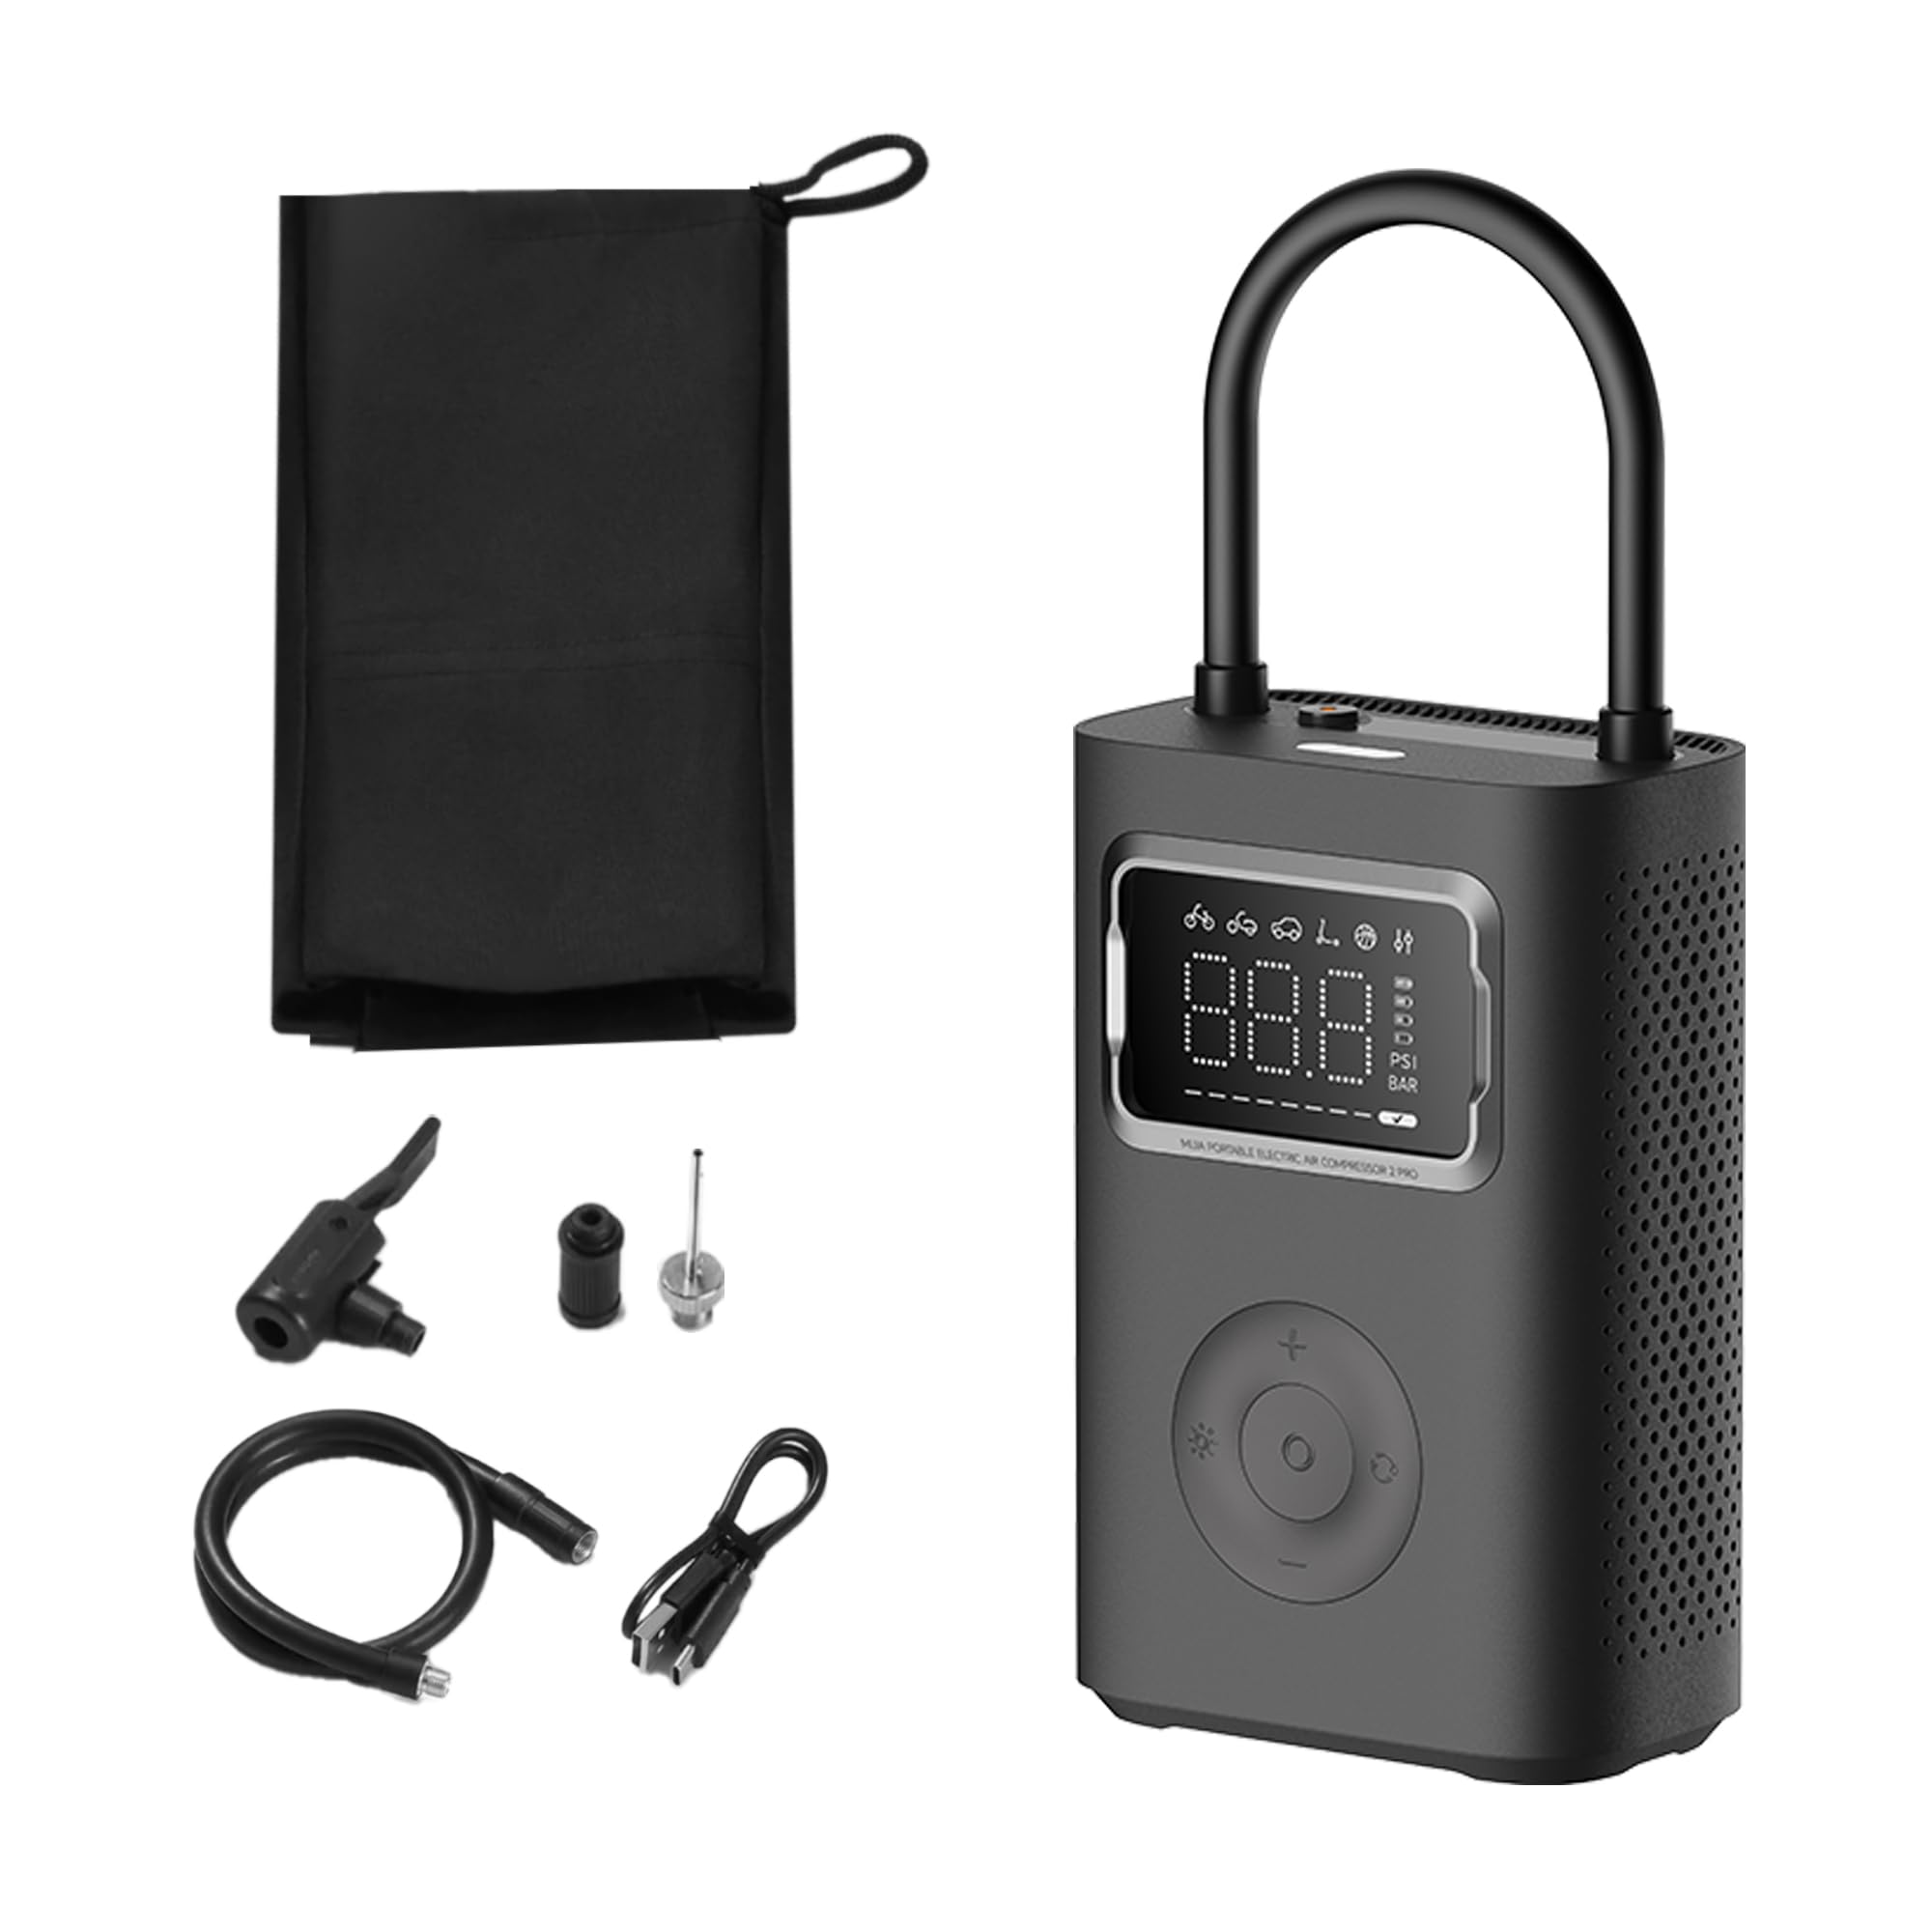
Figure 2: Xiaomi Portable Electric Air Compressor 2 Pro.
Características principales:
- Presión máxima: Hasta 150 PSI para diversas necesidades de inflado.
- Pantalla LED digital: Proporciona lecturas de presión en tiempo real y permite un ajuste preciso de la presión.
- Apagado automático: Detiene automáticamente el inflado una vez que se alcanza la presión preestablecida, evitando el inflado excesivo.
- Inalámbrico y recargable: Powered by a 27 Watt-hour battery, offering portability and convenience.
- Múltiples modos preestablecidos: Includes modes for car, motorcycle, bicycle, electric scooter, and ball, along with a custom mode.
- Dual-Purpose LED Light: Features a white light for illumination and a red light for signaling.
- Compacto y ligero: Diseñado para un fácil almacenamiento y transporte.

Figure 3: Product details showing 150 PSI capability, battery indicator, and hose lock.
Configuración
1. Carga inicial
Before first use, fully charge the air compressor. Connect the provided Type-C charging cable to the charging port on the device and the other end to a 5V/3A USB power adapter (not included). The battery indicator on the display will show charging progress. A full charge typically takes approximately 3.5 hours.
2. Conexión de la manguera de aire
The air hose is stored by being locked into the device. To use, pull the air hose out of its storage slot. This action will automatically power on the device. Connect the appropriate valve adapter (Schrader, Presta, or needle valve) to the end of the air hose, depending on the item you intend to inflate.

Figure 4: Pulling the air hose from its slot to power on the device.
Instrucciones de funcionamiento
1. Encendido / apagado
- Encendido: Pull the air hose out of its storage slot. The device will automatically power on and display the current pressure.
- Apagado: Push the air hose back into its storage slot. The device will automatically power off.
2. Comprensión de la pantalla
The large LED display shows the current pressure, selected mode, and battery level. You can switch between PSI and Bar units using the unit selection button.

Figure 5: Digital display showing mode icons and pressure.
3. Selecting Inflation Modes
Press the mode button to cycle through the 6 preset inflation modes:
- Modo personalizado: Default 35 PSI (adjustable 3-150 PSI / 0.2-10.3 Bar)
- Modo de bicicleta: Predeterminado 45 PSI (ajustable 30-65 PSI)
- Motorbike Mode: Default 2.4 Bar (adjustable 1.8-3.0 Bar)
- Modo coche: Default 2.5 Bar (adjustable 1.8-3.5 Bar)
- Modo patinete eléctrico: Predeterminado 50 PSI (ajustable 45-60 PSI)
- Modo de bola: Predeterminado 8 PSI (ajustable 4-16 PSI)

Figura 6: Sobreview of multiple preset inflation modes.
4. Adjusting Pressure Settings
After selecting a mode, use the '+' and '-' buttons to adjust the target pressure. The display will show the target pressure blinking. Once set, the value will stabilize.
5. Proceso de inflación
- Connect the air hose with the appropriate adapter securely to the valve stem of the item to be inflated.
- La pantalla mostrará la presión actual del artículo.
- Select the desired inflation mode and set the target pressure.
- Press the start button (usually the center button) to begin inflation.
- El compresor se detendrá automáticamente una vez que se alcance la presión objetivo.
- Disconnect the air hose from the valve stem.

Figure 7: Auto pressure detection and inflation for a bicycle tire.
6. Uso de la luz LED
Press the light button to activate the LED light. It has two modes: a white light for illumination in dark environments and a red flashing light for emergency signaling.
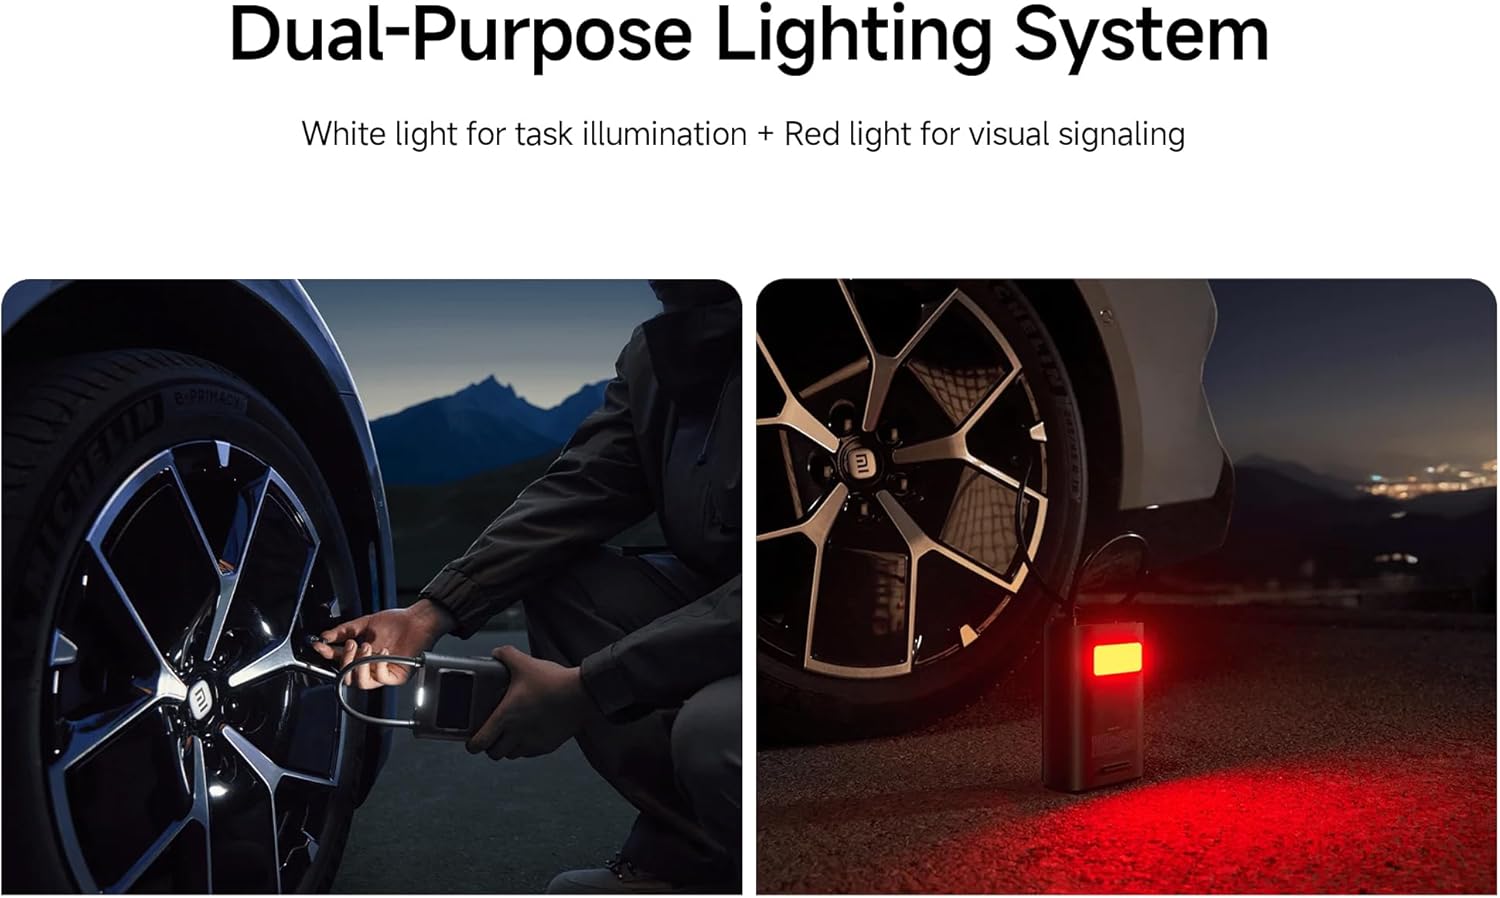
Figure 8: Dual-purpose lighting system in use (white for task, red for signaling).
Cargando
The device is equipped with a 27 Watt-hour rechargeable battery. When the battery level is low, the battery indicator on the display will show a low charge. Connect the Type-C charging cable to recharge. The device can reinflate approximately 16 car tires (from 2.0 Bar to 2.5 Bar) on a full charge, or inflate up to 138 size 7 basketballs (from 0 PSI to 8 PSI).

Figure 9: Battery capacity and inflation performance exampLes.
Mantenimiento
- Limpieza: Limpie el exterior del compresor con un paño suave y húmedo.amp paño. No utilice productos químicos agresivos ni limpiadores abrasivos.
- Almacenamiento: Store the device in a cool, dry place, away from direct sunlight and extreme temperatures. Ensure the air hose is properly stowed to prevent damage.
- Cuidado de la batería: Para una vida útil óptima de la batería, cargue el dispositivo al menos una vez cada tres meses si no lo usa con regularidad.
Solución de problemas
| Problema | Posible causa | Solución |
|---|---|---|
| El dispositivo no se enciende. | Battery is depleted; Air hose not fully pulled out. | Charge the device; Ensure the air hose is fully extended from its slot. |
| La inflación es lenta o ineficaz. | Low battery; Air hose not securely connected; Incorrect pressure setting. | Recharge the device; Check all connections for leaks; Verify the target pressure. |
| El dispositivo se detiene inesperadamente. | Target pressure reached (auto shut-off); Overheating; Low battery. | This is normal if target pressure is met; Allow device to cool down; Recharge the device. |
| Lectura de presión inexacta. | Loose connection; Sensor error. | Ensure the air hose is tightly connected to the valve; If problem persists, contact support. |
Presupuesto
| Característica | Detalle |
|---|---|
| Número de modelo | XM-MJCQB06QW-03 |
| Dimensiones | 10.5 x 8 x 25.5 cm |
| Peso | 1.1 kilogramos |
| Material | Plástico |
| Fuente de poder | Funciona con pilas |
| Volumentage | 10.8 voltios |
| Quétage | 27 vatios-hora |
| Ampcapacidad de erage | 3 Amps |
| Presión máxima | 150 PSI |
| Longitud de la manguera | 200 milímetros |
| Características especiales | Automatic Shut-Off, Digital Display, LED Light, Lightweight |
| Usos recomendados | Tire Inflation (Car, Bike, Motorcycle, Electric Scooter), Ball Inflation, Toy Inflation |
Vídeos oficiales de productos
Vídeo 1: Producto general terminadoview y demostración de características clave.
Video 2: Demonstration of the compressor's portability and ease of use.
Video 3: Detailed look at the inflation process and digital display functionality.
Garantía y soporte
For warranty information or technical support, please refer to the warranty card included with your product or contact the manufacturer directly through their official website. Ensure you have your product model number (XM-MJCQB06QW-03) and purchase details available when seeking support.