Introducción
This manual provides detailed instructions for the installation, operation, and maintenance of your BlackVue Elite 8-2CH Dash Cam. Please read this manual thoroughly before using the product to ensure proper functionality and to maximize your user experience. Keep this manual for future reference.

Image: The BlackVue Elite 8-2CH Dash Cam system, including the main front camera, a smaller rear camera, a BlackVue branded microSD card, and a smartphone screen displaying the BlackVue app interface with key features like STARVIS 2 and 2K QHD recording.
Producto terminadoview
Características principales
- Dual 2K QHD Recording with STARVIS 2 sensors for enhanced clarity.
- Dual HDR for balanced brightness and contrast in varying light conditions.
- Smart Parking Surveillance with pre-event recording and Time Lapse mode.
- Power Saving Mode for extended parking surveillance.
- Integrated Wi-Fi and Cloud connectivity for remote access and footaggestión electrónica.
- Built-in GPS and G-Sensor for impact and movement detection.
¿Qué hay en la caja?
- Cámara de tablero frontal BlackVue Elite 8-2CH
- Cámara trasera
- Soportes para coche (para cámaras delanteras y traseras)
- Cable de alimentación (USB-C)
- Cable de conexión de la cámara trasera
- Tarjeta microSD (512 GB)
- Clips para cables
- Herramienta de palanca
Configuración e instalación
1. Preparar la tarjeta MicroSD
Before installation, ensure the provided microSD card is inserted into the front dash cam. If using a new card, it is recommended to format it using the BlackVue app or PC viewer para un rendimiento óptimo.
2. Monte la cámara frontal
- Limpie el área del parabrisas donde se montará la cámara.
- Attach the front camera mount to the windshield, ideally behind the rearview mirror to avoid obstructing the driver's view. Ensure the lens has a clear view del camino.
- Secure the front camera onto its mount.
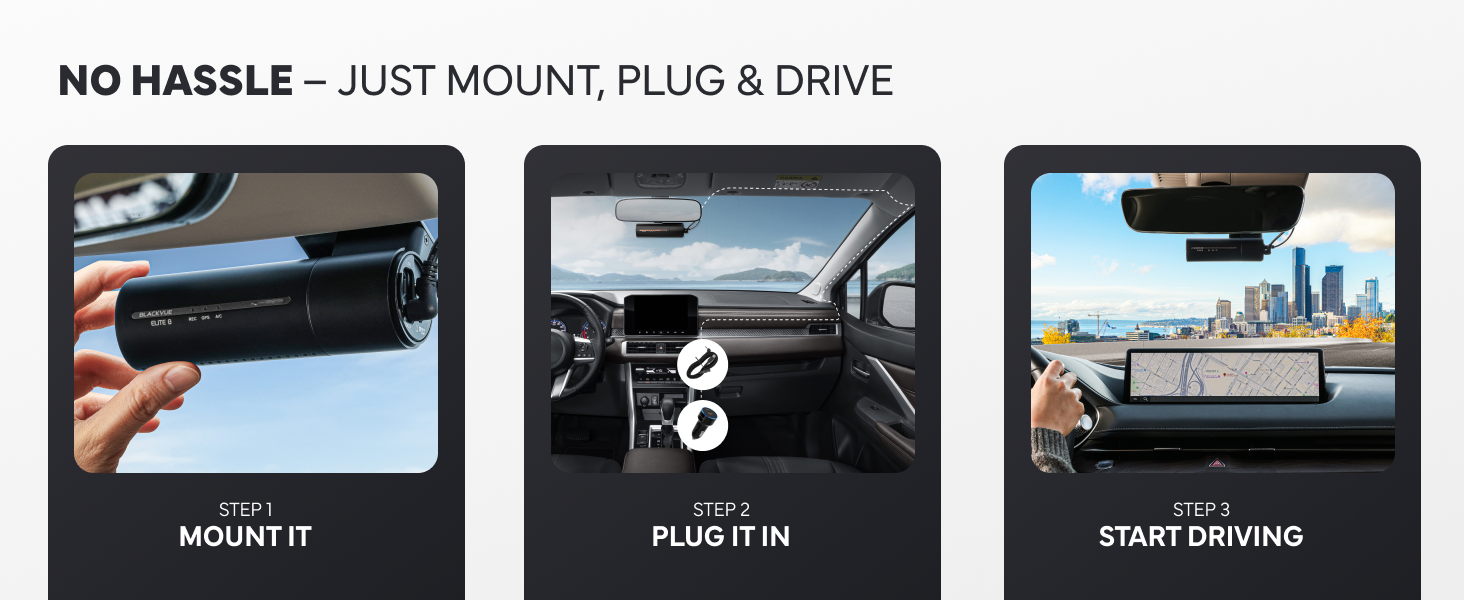
Image: A visual guide showing three steps for installing the dash cam: mounting the camera to the windshield, connecting the power cable, and starting the vehicle.
3. Instalar la cámara trasera
- Monte la cámara trasera en el parabrisas trasero, asegurando una visión nítida. view.
- Connect the rear camera to the front camera using the provided coaxial cable.
- Route the rear camera cable along the vehicle's headliner and pillar trim to the front camera, using the pry tool to tuck the cable neatly.
4. Conecte el poder
- Connect the power cable to the front dash cam.
- Plug the other end of the power cable into your vehicle's 12V power outlet (cigarette lighter socket) or a hardwiring kit (sold separately for advanced parking mode features).
- Route the power cable neatly along the windshield and dashboard edges.

Image: An illustration demonstrating the simple USB-C installation process for the dash cam, showing the camera mounted near the rearview mirror and the power cable connecting to a USB-C port in the car's console.
5. Configuración inicial y emparejamiento de aplicaciones
- Turn on your vehicle's ignition. The dash cam will power on and begin recording.
- Download the BlackVue app from your smartphone's app store.
- Open the app and follow the on-screen instructions for seamless pairing with your dash cam via Wi-Fi. This typically involves connecting to the dash cam's Wi-Fi network.
- Once paired, you can adjust settings, view vivir footage, y descargar grabaciones.

Image: A sequence of smartphone screens illustrating the seamless app pairing process for the BlackVue dash cam, showing notifications, camera list, and real-time streaming.
Instrucciones de funcionamiento
Modos de grabación
- Grabación normal: Grabación continua mientras el vehículo está en movimiento.
- Grabación de eventos: Automatically triggered by impacts or sudden movements detected by the G-Sensor. These files están protegidos contra ser sobrescritos.
- Grabación manual: Initiated by pressing a button on the dash cam, saving a protected segment of footage.
Modo de vigilancia de estacionamiento
The BlackVue Elite 8-2CH offers advanced parking surveillance to monitor your vehicle when parked. Hardwiring is required for full functionality.
- Modo de estacionamiento inteligente: Detects motion and impacts, saving footage from 10 seconds before the event.
- Modo de estacionamiento de ahorro de energía: Consumes less than 1mA in standby and records instantly upon impact, enabling multi-day monitoring.
- Modo de estacionamiento con búfer: Records continuously in a low-power state and saves footage including the moments leading up to an event (motion or impact detection).
- Modo de lapso de tiempo: Records one frame per second, optimizing microSD usage for extended surveillance.

Image: A graphic illustrating the 'Elite Protection 24/7' feature, depicting a car collision being recorded by the dash cam and the footage being sent to the cloud, emphasizing continuous monitoring even when away from the vehicle.

Image: A visual representation of the Power Saving Parking Mode, highlighting its benefits: ultra-low power consumption, capability for several days of protection, and high heat resistance due to a built-in super-capacitor.

Image: A diagram explaining Buffered Parking Mode, showing motion and impact detection (recording 10 seconds pre-impact) and Time Lapse recording (one frame per second for 30x playback speed).
Funciones de Wi-Fi y la nube
Utilize the BlackVue app to access your dash cam's features:
- Vivir View: Stream real-time video from both front and rear cameras.
- Reproducción y descarga de vídeo: Review comida grabadatage and download important clips directly to your smartphone.
- Configuración de ajustes: Adjust camera settings, recording options, and Wi-Fi preferences.
- Nube BlackVue: With an internet connection (via a separate Wi-Fi hotspot in your vehicle or home Wi-Fi), access features like remote live view, instant impact alerts, GPS tracking, and cloud backup of event videos.
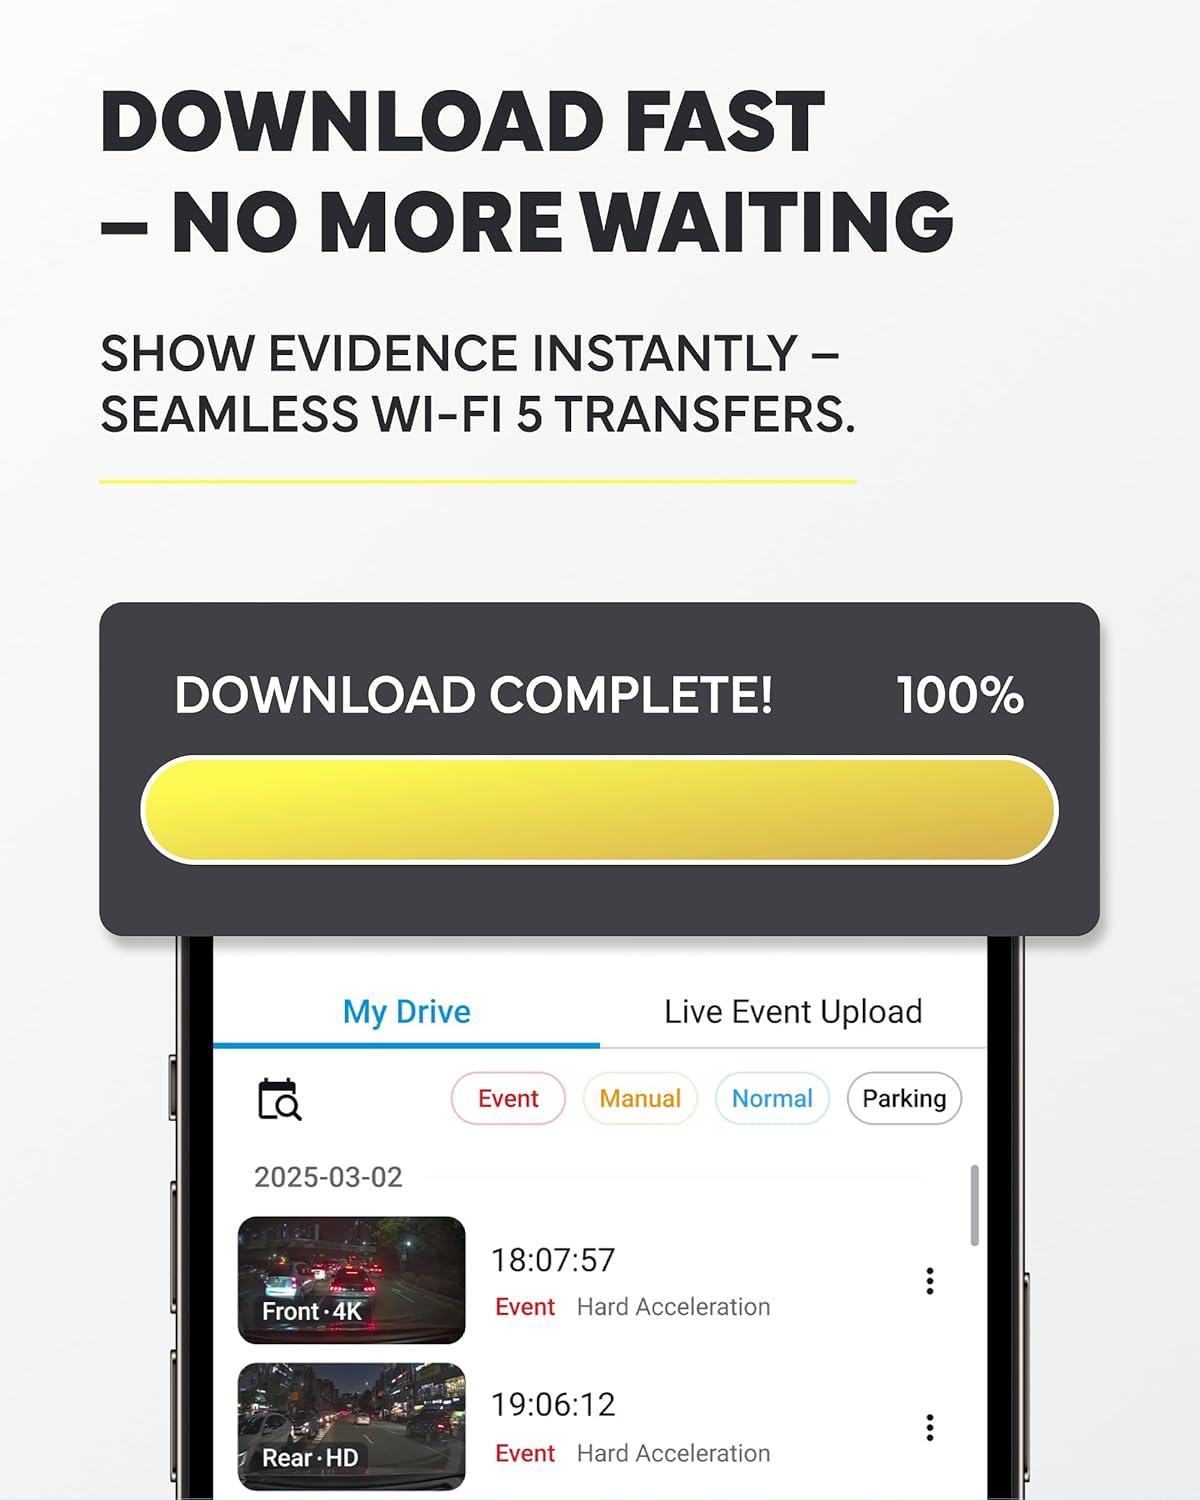
Image: A smartphone screen displaying a 'Download Complete!' notification, indicating successful transfer of dash cam footage via Wi-Fi, with a list of recorded events below.

Image: A graphic detailing BlackVue Cloud features, including the ability to watch, save, and share footage anytime, anywhere, with 1GB of free cloud storage, instant impact alerts, remote live view access, and GPS tracking via the app.
Video Quality Features
- 2K QHD with STARVIS 2: Both front and rear cameras record in 2K Quad High Definition (2560p) at 30 frames per second, utilizing Sony STARVIS 2 image sensors for superior low-light performance and clarity.
- HDR dual: High Dynamic Range technology is applied to both cameras to ensure balanced exposure and detail in scenes with high contrast, such as bright sunlight and deep shadows.

Image: A side-by-side comparison demonstrating the effect of Dual HDR, showing a 'Before' image with blurry license plates and an 'After' image with clear, readable license plates, highlighting improved clarity day or night.

Image: A comparison illustrating the benefits of STARVIS 2 2K QHD, showing a 'Before' image with grainy, less clear night footage and an 'After' image with significantly improved clarity and detail in low-light conditions.
Mantenimiento
Gestión de tarjetas MicroSD
- Formato: Regularly format the microSD card (at least once a month) to prevent recording errors and extend its lifespan. This can be done via the BlackVue app or PC viewes.
- Reemplazo: MicroSD cards have a limited lifespan. Replace the card if you experience frequent recording errors or if it fails to format. Use only high-endurance microSD cards recommended by BlackVue.
Limpieza de las lentes de la cámara
Gently wipe the front and rear camera lenses with a soft, lint-free cloth to ensure clear video quality. Avoid using abrasive cleaners that could scratch the lens.
Actualizaciones de firmware
Periodically check for firmware updates via the BlackVue app or website. Firmware updates can improve performance, add new features, and fix bugs. Follow the instructions provided with the update carefully.
Solución de problemas
Problemas comunes y soluciones
- La cámara no se enciende: Verifique la conexión del cable de alimentación a la cámara del tablero y a la toma de corriente del vehículo. Asegúrese de que el encendido del vehículo esté activado.
- Errores de grabación: Format the microSD card. If the issue persists, try a new BlackVue-recommended microSD card.
- Problemas de conexión Wi-Fi: Ensure the dash cam's Wi-Fi is enabled. Restart both the dash cam and your smartphone. Try re-pairing through the BlackVue app.
- Mala calidad de video: Clean the camera lenses. Ensure the protective film has been removed from the lenses. Check settings in the BlackVue app to confirm desired resolution and quality.
- El GPS no funciona: Asegúrese de que la cámara del tablero tenga una imagen clara view of the sky. GPS signal acquisition can take a few minutes after startup.
For more detailed troubleshooting, refer to the BlackVue support websitio o póngase en contacto con el servicio de atención al cliente.
Presupuesto
| Característica | Especificación |
|---|---|
| Dimensiones del producto | 3.7 x 6.26 x 3.54 pulgadas |
| Peso del artículo | 1.93 libras |
| Tecnología de conectividad | Wifi |
| Características especiales | Dual 2K QHD + STARVIS 2, Dual HDR, Power Saving Mode, Smart Parking Mode, Wi-Fi & Cloud |
| Resolución de captura de video | 2560p (QHD 2K) |
| Componentes incluidos | Soporte para coche |
| Tipo de montaje | soporte de montaje |
| Tipo de memoria flash | microSD |
| Fabricante | Pittasoft |
Garantía y soporte
Información de garantía
For detailed warranty information, please refer to the official BlackVue webSitio web o la tarjeta de garantía incluida con el producto. Las condiciones de la garantía suelen cubrir defectos de fabricación durante un período específico a partir de la fecha de compra.
Atención al cliente
If you encounter any issues not covered in this manual or require further assistance, please visit the official BlackVue support page or contact their customer service directly. Contact information can usually be found on the BlackVue websitio.


