1. Introducción
Thank you for choosing the Dreo DR-KMF002 8-in-1 Electric Milk Frother. This manual provides essential information for safe operation, optimal performance, and proper maintenance of your new appliance. Please read it thoroughly before first use and keep it for future reference.
This versatile milk frother is designed to elevate your beverage experience, offering 8 different functions for both hot and cold milk preparations, from silky micro-foam for latte art to dense foam for cappuccinos and mixing powdered drinks.
2. Producto terminadoview y componentes
Familiarize yourself with the components of your Dreo Electric Milk Frother:
- Frother Jug (Stainless Steel)
- Tapa
- Frothing Whisk (for micro-foam)
- Mixing Disk (for dense foam and mixing)
- Base de poder
- Manual de usuario
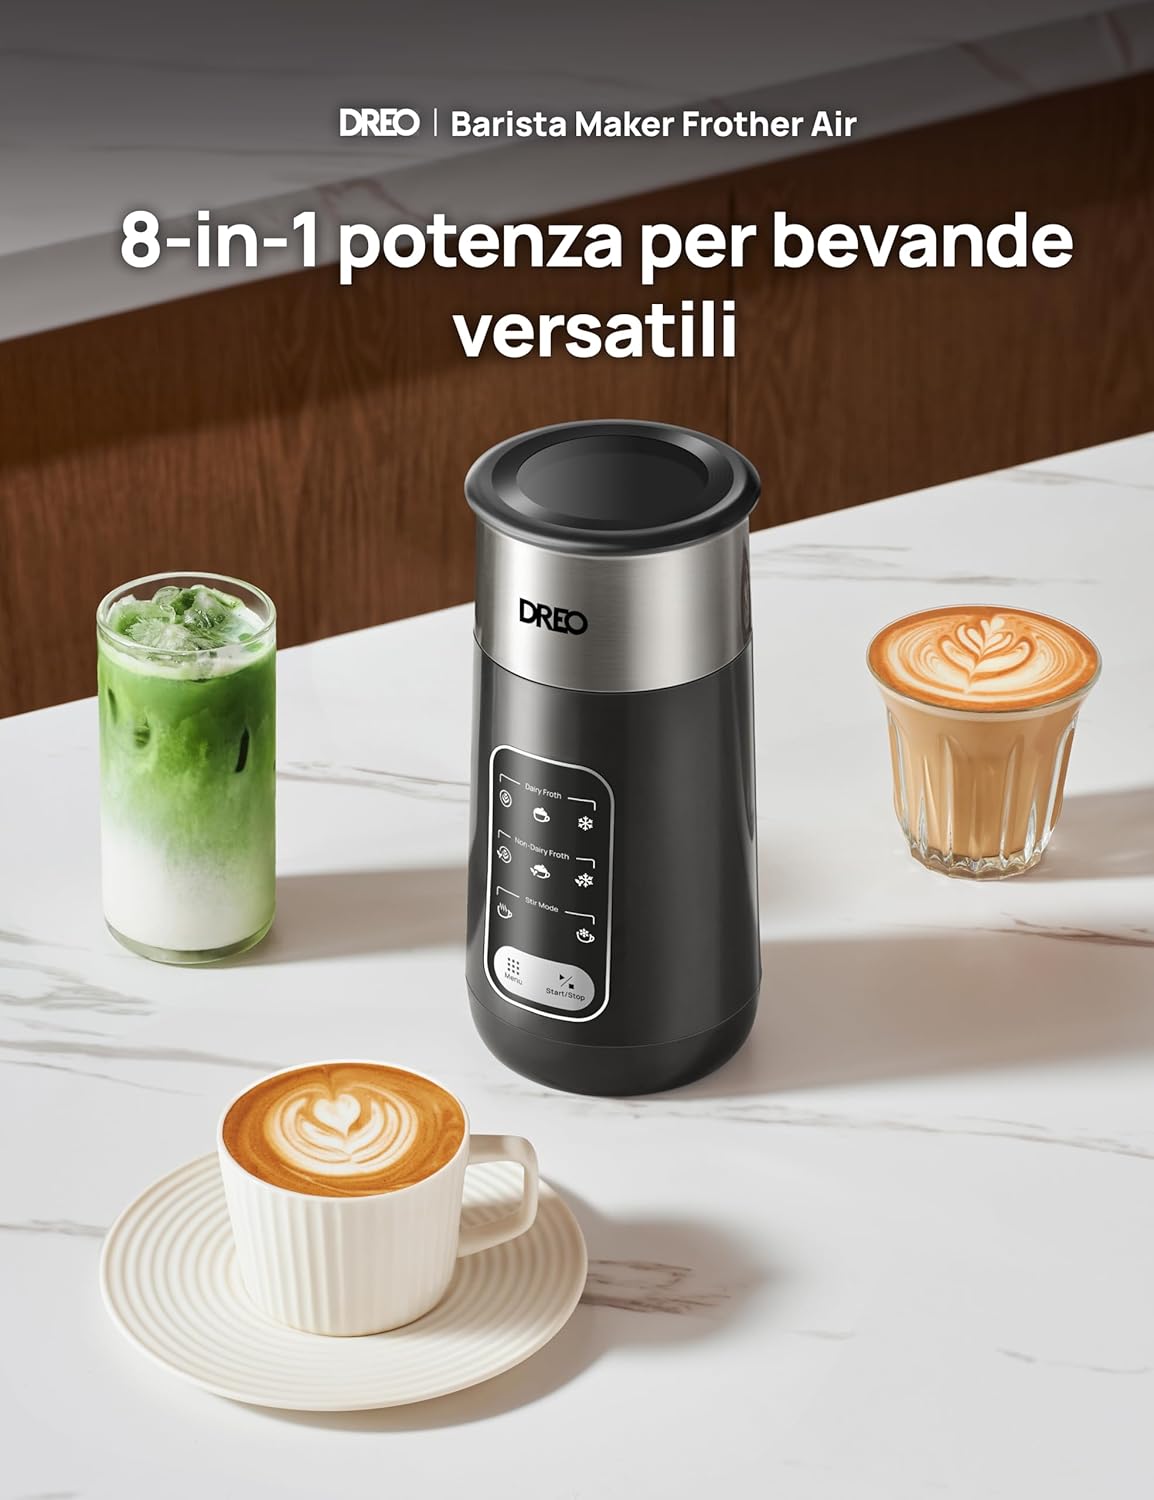
Figure 2.1: Dreo DR-KMF002 Electric Milk Frother with various coffee drinks.

Figure 2.2: The two interchangeable frothing tips: impeller for micro-foam and disk for dense foam.
3. Configuración
3.1 Desembalaje
- Retire con cuidado todos los componentes del embalaje.
- Remove any stickers or protective films.
- Conserve el embalaje para futuro almacenamiento o transporte.
3.2 Limpieza inicial
Before first use, clean the frother jug and accessories thoroughly:
- Wash the frother jug, lid, frothing whisk, and mixing disk with warm, soapy water.
- Enjuague bien y seque completamente todas las piezas.
- Limpie la base de energía con un anuncioamp Paño. No sumerja la base de alimentación en agua.
3.3 Asamblea
- Place the desired frothing whisk or mixing disk onto the shaft at the bottom of the frother jug. Ensure it is securely attached.
- Coloque la jarra del espumador sobre la base eléctrica.
- Ensure the power base is placed on a stable, flat, and dry surface.
4. Instrucciones de funcionamiento
The Dreo DR-KMF002 offers 8 versatile functions for various milk preparations. Always ensure the correct whisk/disk is installed for your desired function.

Figure 4.1: The 8 available frothing modes for your favorite drinks.
4.1 Preparing Milk
- Pour milk into the frother jug. Observe the MAX/MIN fill lines inside the jug.
- For frothing, do not exceed the 'MAX Froth' line (120 ml for dense foam, 170-190 ml for latte art). For heating only, do not exceed the 'MAX Heat' line (270 ml).
- Coloque la tapa de forma segura en la jarra.

Figure 4.2: The frother is suitable for all milk types, including dairy and plant-based options.
4.2 Seleccionar una función
The frother features an intuitive LED screen and buttons. Press the power button to cycle through the available 8 functions:
- Latte Art: Produces silky micro-foam (use frothing whisk).
- Capuchino: Creates dense, rich foam (use mixing disk).
- Cold Cappuccino: Cold dense foam (use mixing disk, cold setting).
- Frappuccino: Blends for cold, creamy drinks (use mixing disk, cold setting).
- Cuban Espresso: Mixes for specific coffee preparations.
- Cold Brew with Cold Foam: Adds cold foam to cold brew.
- Chocolate caliente: Heats and mixes chocolate powder (use mixing disk).
- Protein Drink: Mixes protein powders (use mixing disk).
The multi-level frothing program precisely controls temperature, time, and speed. For hot milk, it heats to an optimal 65 °C, and the special impeller tip design prevents scorching, ensuring homogeneous foam.

Figure 4.3: The 8-in-1 power for versatile beverages.

Figure 4.4: Touch the button to froth and enjoy your drink.

Figure 4.5: Micro-foam for latte art, achieving barista quality at home.

Figure 4.6: The key to ultra-fine micro-foam perfection through multi-stage frothing.

Figure 4.7: More Interface Functions, including 45dB super quiet operation and clear capacity markings.
5. Mantenimiento y limpieza
Proper cleaning ensures the longevity and hygiene of your milk frother. The stainless steel jug features a waterproof and non-stick design for easy cleaning.
- Unplug the power base from the outlet after each use.
- Remove the frother jug from the power base.
- Remove the frothing whisk/mixing disk from the jug.
- Wash the jug, lid, whisk, and disk with warm, soapy water. Rinse thoroughly.
- Limpie el exterior de la base de alimentación con adamp cloth. Do not immerse the main unit or power base in water.
- Asegúrese de que todas las piezas estén completamente secas antes de volver a montarlas o guardarlas.
WARNING: The frother jug is NOT dishwasher safe. Hand wash only.

Figure 5.1: Quick rinse for impeccable clean. Note: Not dishwasher safe.

Figure 5.2: The anti-scald impeller protects milk from scorching.
6. Solución de problemas
- El espumador no arranca: Ensure the power base is properly plugged in and the frother jug is correctly placed on the base. Check if the power button is pressed.
- Milk is not frothing or foam is not optimal:
- Ensure the correct whisk/disk is installed for the desired function.
- Check milk level; do not exceed the MAX froth line.
- Try different types of milk (e.g., whole milk, barista-style plant-based milk often froth better).
- Ensure the milk is cold before frothing for cold foam.
- Milk is burnt or sticking to the bottom:
- Ensure the frother jug is clean before use.
- Do not use milk that is past its expiration date.
- The anti-scald feature minimizes this, but always clean immediately after use.
7. Especificaciones
| Característica | Descripción |
|---|---|
| Número de modelo | DR-KMF002 |
| Dimensiones | 9.85 x 9.85 x 20.7 cm |
| Peso | 800 gramos |
| Material | Plástico, acero inoxidable |
| Color | Negro |
| Características especiales | Auto Shut-Off, Lightweight, Variable Froth Setting |
| Componentes incluidos | 1 × Dreo Milk Frother (DR-KMF002), 1 × Quick Start Guide, 1 × User Manual |
8. Garantía y soporte
For warranty information and customer support, please refer to the warranty card included with your product or visit the official Dreo webSitio. Conserve su recibo de compra como comprobante de compra.
9. Información de seguridad
Please read and follow all safety instructions to prevent accidents and ensure safe operation:
- Always add liquid before turning on the machine to avoid dry burning.
- Clean immediately after each use and unplug the power base before cleaning.
- No sumerja la unidad principal ni la base de alimentación en agua.
- Ensure the bottom of the frother jug is completely dry before placing it back on the power base.
- Be careful to prevent water from entering the interior of the machine during cleaning.
- Do not clean the frother jug in a dishwasher.
- Mantener fuera del alcance de los niños.
- No utilice el aparato con un cable o enchufe dañado.
- Utilice únicamente los accesorios suministrados.