Introducción
Gracias por la compraasing the ROCAM Digital Radio Alarm Clock. This manual provides detailed instructions for setting up, operating, and maintaining your device. Please read this manual thoroughly before use to ensure proper function and longevity of the product.
Información de seguridad
- Asegúrese de que el dispositivo esté conectado a una fuente de alimentación con el voltaje correcto.tage.
- No exponga el dispositivo al agua ni a la humedad excesiva.
- Evite colocar el dispositivo cerca de fuentes de calor o bajo la luz solar directa.
- No intente desmontar ni reparar el dispositivo usted mismo. Contacte con personal de servicio técnico cualificado.
- Mantener fuera del alcance de los niños.
Producto terminadoview
The ROCAM Digital Radio Alarm Clock features a clear display, intuitive controls, and multiple functions including FM radio, Bluetooth speaker, night light, and charging ports.

Frente view of the ROCAM Digital Radio Alarm Clock, showing the large digital display and speaker grille.
Características principales:
- FM Radio (87.5 MHz - 108.0 MHz) with 20 presets.
- Bluetooth 5.0 speaker with 10m wireless range.
- Adjustable night light.
- USB and Type-C charging ports.
- Large, dimmable LED display (5 brightness levels).
- Dual alarm modes with classic beep or radio sound.
- 12/24 hour format and DST function.
- Battery backup for time and settings during power outages.
Configuración
1. Conexión eléctrica:
Connect the provided power adapter to the DC input port on the back of the alarm clock and plug it into a wall outlet. The clock requires plug power to operate. The internal battery serves as a backup for settings during power interruptions.
2. Encendido inicial:
Once connected, the display will light up. You may need to set the time manually if it's the first use or after a prolonged power disconnection without battery backup.
Instrucciones de funcionamiento
Configuración de fecha y hora:
- Mantenga pulsado el Hora establecida button (or similar button, usually indicated by a clock icon). The hour digits will start flashing.
- Girar el Time/Volume knob para ajustar la hora.
- Presione el Hora establecida Botón nuevamente para confirmar la hora y pasar a los minutos.
- Girar el Time/Volume knob para ajustar los minutos.
- Presione el Hora establecida button once more to save the time.
- Para cambiar entre el formato de 12 horas y 24 horas, presione el botón 12/24 horas botón.
Configuración de alarmas:
El reloj admite dos alarmas independientes.
- Mantenga pulsado el Alarma 1 or Alarma 2 Botón. Los dígitos de la hora de la alarma parpadearán.
- Girar el Time/Volume knob para establecer la hora de alarma deseada.
- Presione el correspondiente Alarma Botón nuevamente para confirmar la hora y pasar a los minutos.
- Girar el Time/Volume knob para configurar los minutos de alarma deseados.
- Presione el Alarma button again to select the alarm sound: classic beep or FM radio.
- Presione el Alarma button one last time to save the alarm setting.
- Para activar/desactivar una alarma, presione brevemente el botón correspondiente. Alarma Botón. Un icono de alarma aparecerá/desaparecerá en la pantalla.
The alarm clock display showing the time and an active alarm icon, indicating the alarm function is set.
Función de repetición:
Cuando suene una alarma, presione el Posponer/luz button to temporarily silence the alarm for a few minutes (default snooze time). The alarm will sound again after the snooze period.
Funcionamiento de la radio FM:
- Presione el Modo Botón para cambiar al modo de radio FM.
- Para realizar un escaneo automático de estaciones, mantenga presionada la tecla Escanear button. The radio will search for and save up to 20 available stations (87.5 MHz to 108.0 MHz).
- Para sintonizar manualmente, presione brevemente el botón Anterior/Siguiente Botones para ajustar la frecuencia.
- Girar el Time/Volume knob para ajustar el volumen de la radio (16 niveles).

The alarm clock display showing an FM radio frequency, indicating it is in radio mode.
Emparejamiento Bluetooth:
- Presione el Modo button to switch to Bluetooth mode. The display will show a Bluetooth icon, usually flashing to indicate pairing mode.
- On your mobile device or computer, enable Bluetooth and search for "ROCAM Alarm Clock" (or similar device name).
- Select the device to pair. Once connected, the Bluetooth icon on the clock's display will stop flashing.
- Ahora puedes transmitir audio desde tu dispositivo al despertador.
- Girar el Time/Volume knob to adjust the playback volume.

Un interno view of the ROCAM alarm clock highlighting its Bluetooth 5.0 capabilities and speaker components, demonstrating its audio features.
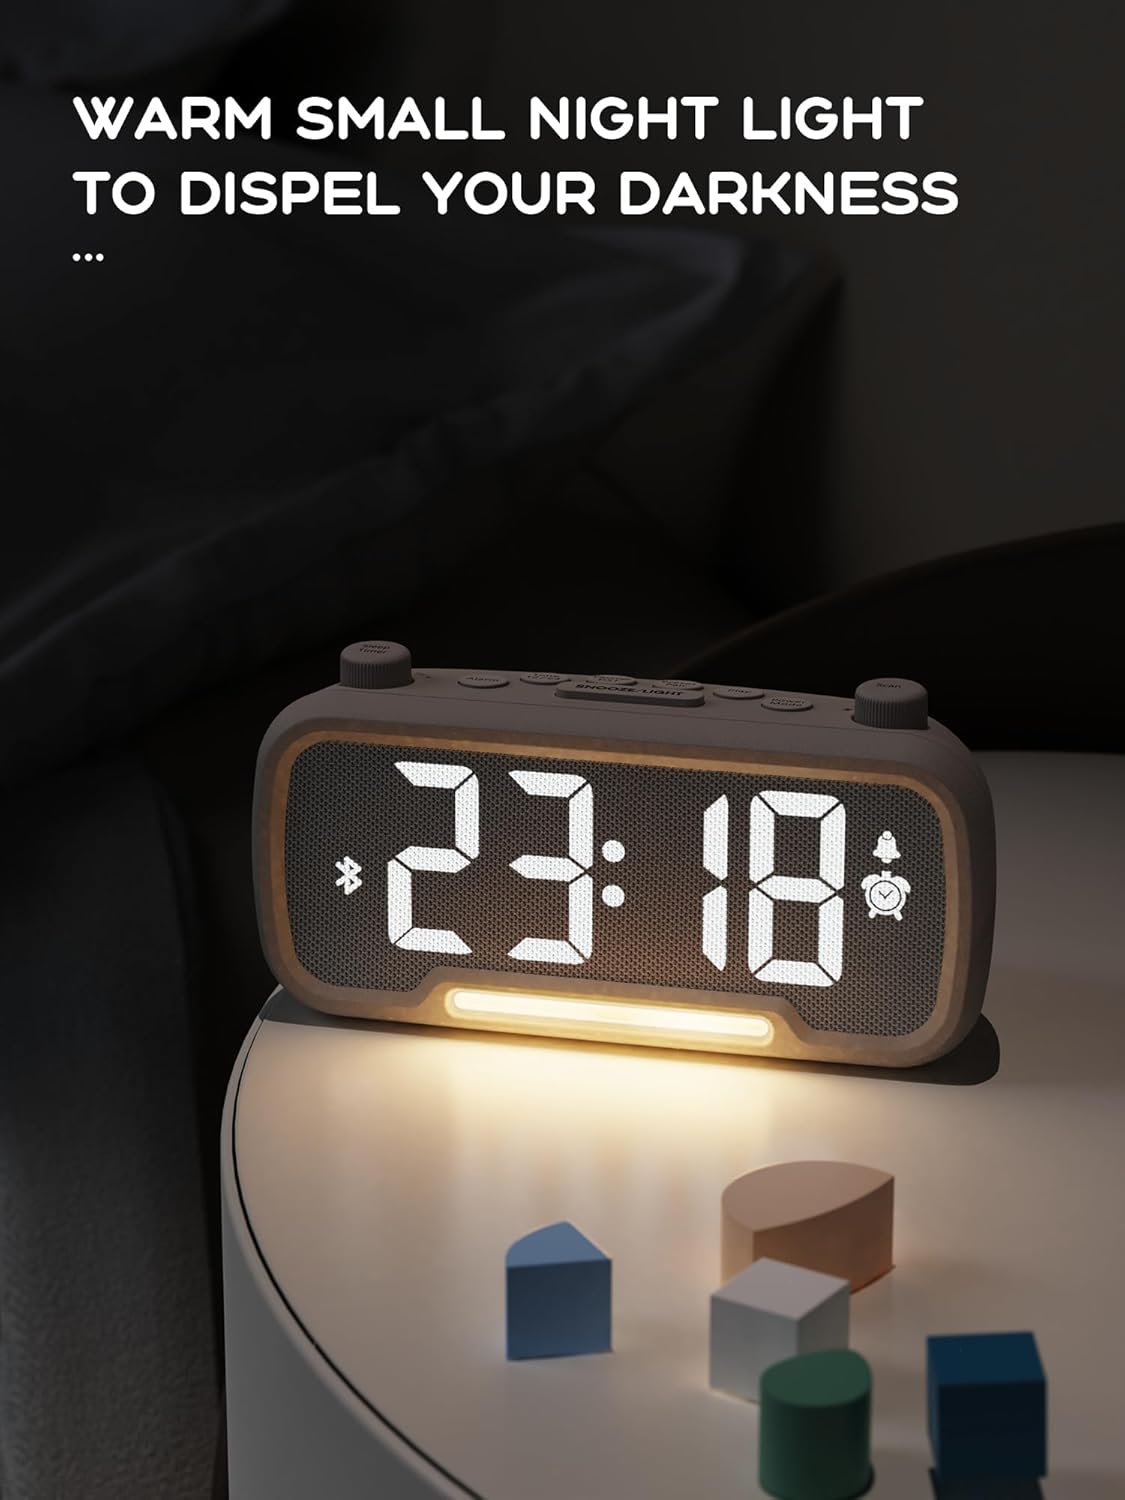
Función de luz nocturna:
The alarm clock features an integrated night light.
- Presione brevemente el Posponer/luz Botón para encender o apagar la luz nocturna.
- The night light has adjustable brightness levels. Press and hold the Posponer/luz button to cycle through the brightness options.

The ROCAM alarm clock on a bedside table, with its warm night light illuminated, providing ambient lighting.
Ajuste del brillo de la pantalla:
The main display has 5 adjustable brightness levels.
- Presione el Brillo button (or similar, often combined with Snooze/Light) to cycle through the display brightness levels.
- Seleccione el nivel que sea más cómodo para su entorno.
Función de horario de verano (DST):
Para ajustar el horario de verano:
- Presione brevemente el Horario de verano button (or similar, often indicated by a sun icon). The time will automatically adjust forward or backward by one hour.
- Press it again to revert the change.
Puertos de carga USB y tipo C:
The alarm clock includes USB and Type-C ports for charging external devices.
- Connect your device's charging cable to the appropriate USB or Type-C port on the back of the alarm clock.
- Ensure the alarm clock is powered on for the charging ports to function.
Mantenimiento
- Limpie el dispositivo con un paño suave y seco. No utilice limpiadores líquidos ni productos abrasivos.
- Mantenga el dispositivo libre de polvo y residuos para garantizar una ventilación adecuada.
- Si el dispositivo no se utilizará durante un período prolongado, desconéctelo de la toma de corriente.
Solución de problemas
| Problema | Posible causa | Solución |
|---|---|---|
| La pantalla del reloj está apagada. | Sin energía, se corta la energíatage, or device is off. | Check power connection. Ensure the power adapter is securely plugged in. If there was a power outage, the battery backup should maintain settings, but the display requires main power. |
| La alarma no suena. | Alarm is not activated, volume is too low, or incorrect time set. | Ensure the alarm icon is visible on the display. Increase alarm volume. Verify alarm time is set correctly. |
| La recepción de radio FM es mala. | Señal débil, antena no extendida o interferencia. | Adjust the position of the device. Extend the FM antenna fully. Try auto-scanning for stations again. Avoid placing near other electronic devices. |
| El dispositivo Bluetooth no se puede emparejar. | Clock not in Bluetooth mode, device too far, or already paired with another device. | Ensure the clock is in Bluetooth mode (flashing icon). Move your device closer to the clock. Disconnect from other Bluetooth devices. |
| USB/Type-C charging not working. | Clock not powered, cable faulty, or device not compatible. | Ensure the alarm clock is plugged into a wall outlet. Try a different charging cable. Verify your device is compatible with standard USB charging. |
Presupuesto
| Característica | Detalle |
|---|---|
| Marca | ROCAM |
| Modelo | B0FNWB172Z |
| Color | Gris |
| Dimensiones | 16.8 x 3.81 x 8.4 cm (6.6 x 1.5 x 3.3 pulgadas) |
| Peso | 350 g (0.77 libras) |
| Fuente de poder | Eléctrico con cable |
| Batería | 1 Lithium-metal battery (included, for backup) |
| Rango de frecuencia FM | 87.5 MHz - 108.0 MHz |
| Versión de Bluetooth | 5.0 |
| Brillo de la pantalla | 5 niveles ajustables |
| Niveles de volumen | 16 niveles ajustables |
Garantía y soporte
Para obtener información sobre la garantía o asistencia técnica, consulte los datos de contacto proporcionados con su compra o visite el sitio web oficial de ROCAM. webSitio. Conserve su comprobante de compra para reclamaciones de garantía.


