1. Producto terminadoview
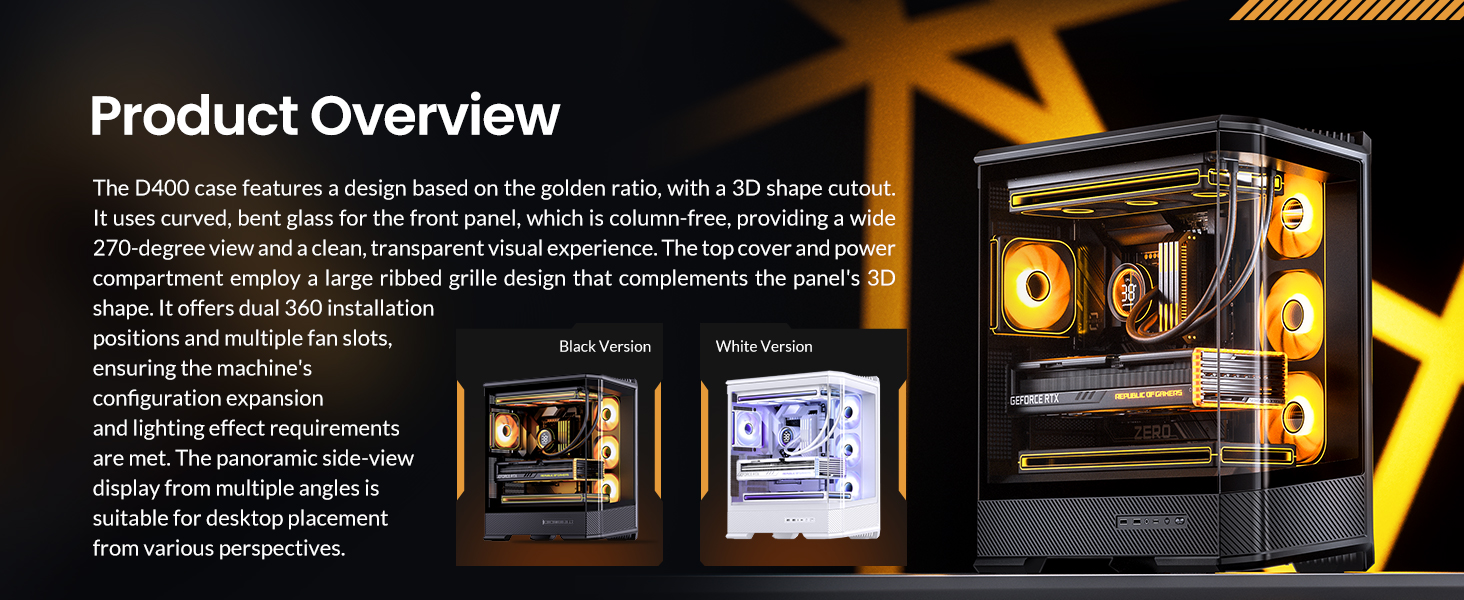
The JONSBO D400 is a white ATX Mid-Tower PC case featuring a three-dimensional beveled curved glass design, allowing for clear visibility of internal hardware. It supports BTF motherboards, ATX power supplies, and dual 360mm AIO liquid coolers, offering extensive cooling and component compatibility.
Características principales:
- Dimensiones: 488mm (L) x 239mm (W) x 514mm (H) (including feet).
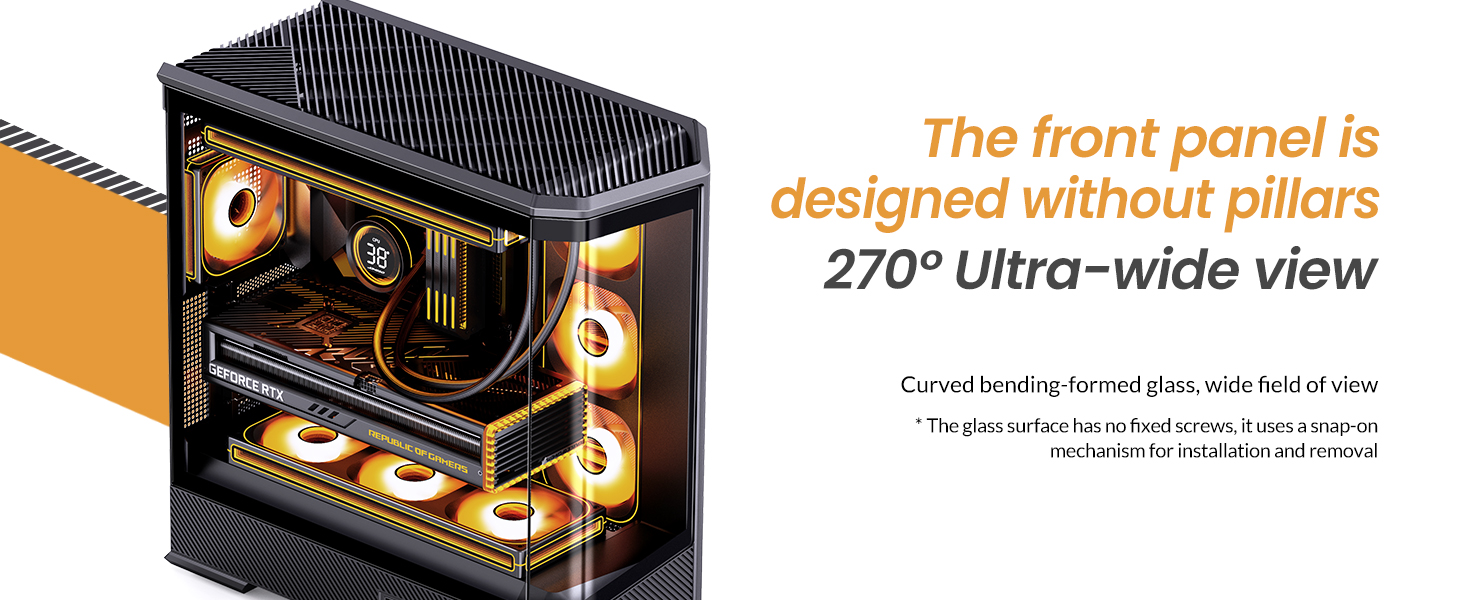
- Diseño: Three-dimensional beveled curved glass for enhanced aesthetics and hardware visibility.
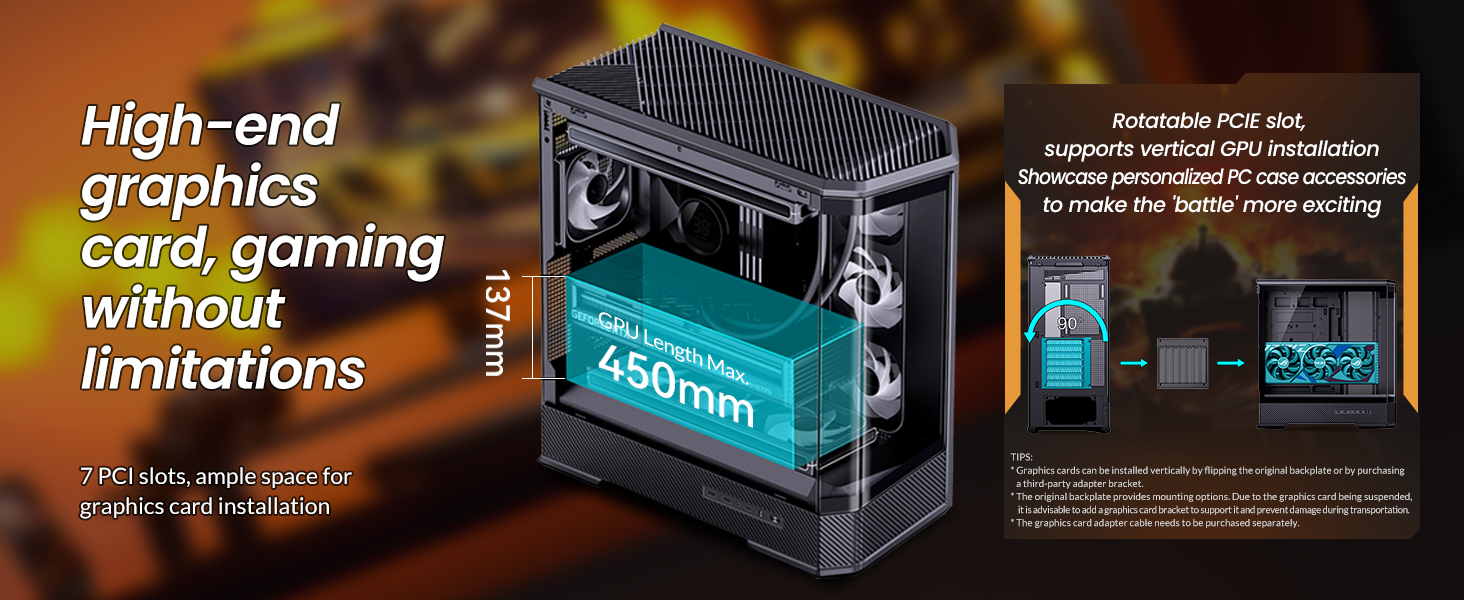
- Compatibilidad con GPU: Graphics cards up to 450mm in length.
- Soporte de fuente de alimentación: ATX PS2 power supplies.
- Refrigeración por aire: CPU coolers up to 169mm in height.
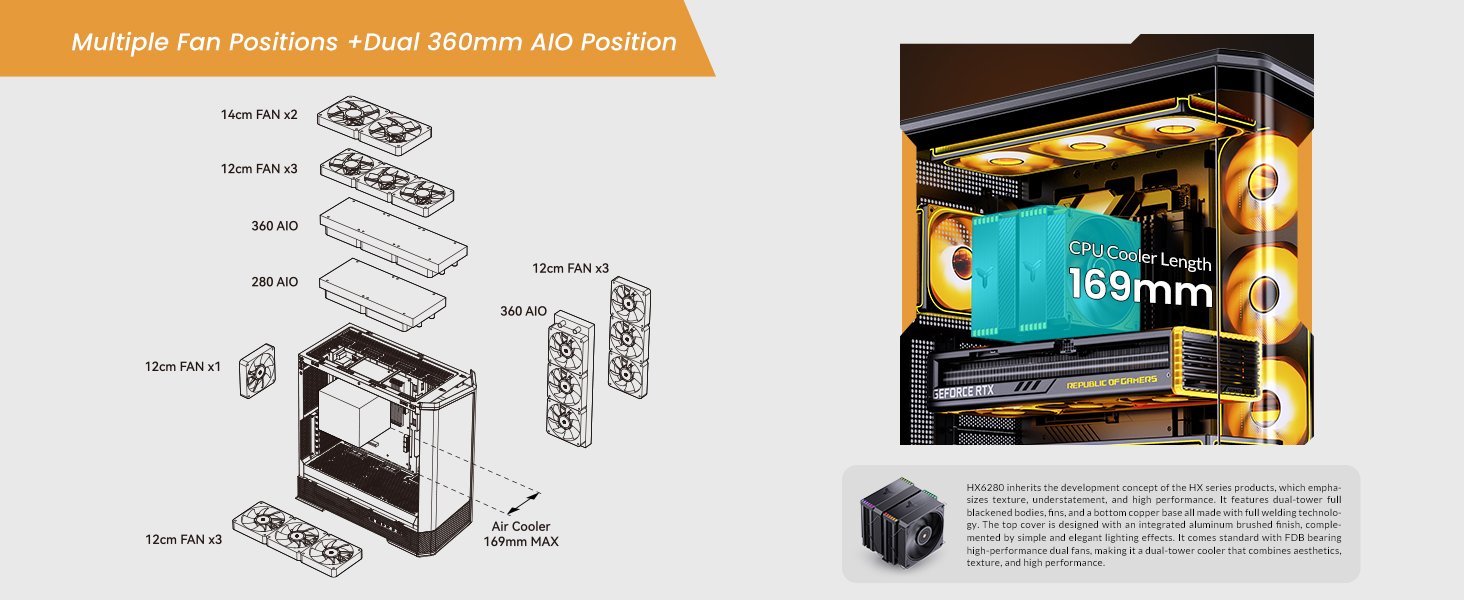
- Refrigeración líquida (AIO): Supports top-mounted 240mm, 280mm, or 360mm AIOs, and side-mounted 360mm AIOs.
- Posiciones de los fans: Up to 10 fan positions for optimal airflow (Top: 3x120mm/2x140mm; Side: 3x120mm; Rear: 1x120mm; Power Compartment: 3x120mm).
- Bahías de unidad: Flexible storage options including 2x 2.5" SSDs, or 1x 3.5" HDD + 1x 2.5" SSD (back side), and 1x 2.5" SSD or 1x 3.5" HDD (PSU compartment).
- E / S frontal: 1x USB3.2 Gen2 Type-C, 2x USB3.0, 1x AUDIO + 1x MIC (2-in-1).
- Ranuras de expansión: 7.

2. Especificaciones
| Característica | Detalle |
|---|---|
| Marca | Jonsbo |
| Nombre del modelo | D400 |
| Tipo de caso | Torre Media |
| Color | Blanco |
| Material | Metal |
| Dimensiones del producto (LxAnxAl) | 19.21 x 9.21 x 20.43 pulgadas (488 x 239 x 514 mm) |
| Peso del artículo | 23.6 libras |
| Compatibilidad de la placa base | ATX, Micro ATX, Mini ITX, BTF Motherboard |
| Longitud de GPU (máx.) | ≤450 mm |
| Altura del enfriador de CPU (máx.) | 169 mm |
| Soporte de fuente de alimentación | ATX PS2 (≤200mm), Bottom Mount |
| Soporte AIO | Top: 240mm/280mm/360mm (optional); Side: 360mm (optional) |
| Fan Positions | Top: 3x120mm/2x140mm; Side: 3x120mm; Rear: 1x120mm; Power Compartment: 3x120mm |
| Bahías de unidad | Back Side: 2x 2.5" SSD or 1x 3.5" HDD + 1x 2.5" SSD; PSU Compartment: 1x 2.5" SSD or 1x 3.5" HDD |
| Puertos de E / S frontales | 1x USB3.2 Gen2 Type-C, 2x USB3.0, 1x AUDIO + 1x MIC (2-in-1) |
| Ranuras de expansión | 7 |
3. Configuración e instalación
This section provides general guidelines for installing components into your JONSBO D400 PC case. Always refer to the specific manuals for your individual components (motherboard, GPU, PSU, etc.) for detailed instructions.
3.1 Preparación del caso
- Carefully remove the side glass panels. The beveled curved glass design allows for easy access.
- Identify the motherboard standoffs. Ensure they match your motherboard's form factor (ATX, Micro ATX, Mini ITX, or BTF).

3.2 Instalación de la placa base
- Align your motherboard with the standoffs in the case.
- Asegure la placa base utilizando los tornillos provistos.
- Connect the front I/O cables (USB 3.0, USB Type-C, Audio, Power/Reset switches, LED indicators) to the appropriate headers on your motherboard.

3.3 Instalación de la unidad de fuente de alimentación (PSU)
- The JONSBO D400 supports ATX PS2 power supplies and features a bottom-mount design.
- Install the PSU into its designated compartment at the bottom rear of the case.
- Asegure la fuente de alimentación con tornillos.
- Pase los cables de alimentación necesarios a través de los recortes de gestión de cables.

3.4 Instalación de la tarjeta gráfica (GPU)
- La carcasa admite GPU de hasta 450 mm de longitud.
- Retire las cubiertas de las ranuras de expansión necesarias en la parte trasera de la carcasa.
- Insert your GPU into the primary PCIe slot on your motherboard and secure it with screws.
- Connect the required PCIe power cables from your PSU to the GPU.
3.5 Cooling System Installation (Fans & AIO)
- The D400 offers 10 fan positions: Top (3x120mm/2x140mm), Side (3x120mm), Rear (1x120mm), and Power Compartment (3x120mm).
- For AIO liquid coolers, the case supports up to 360mm radiators on the top and side.
- Install fans or radiators into your desired positions, ensuring proper airflow direction (intake/exhaust).
- Connect fan and AIO pump cables to your motherboard headers or a fan controller.
3.6 Instalación de la unidad de almacenamiento
- The case provides mounting options for 2.5" SSDs and 3.5" HDDs.
- Install your drives into the designated drive bays (back side of motherboard tray or PSU compartment).
- Secure the drives with screws and connect SATA data and power cables.

4. Instrucciones de funcionamiento
Once all components are installed and secured, and the side panels are reattached, your JONSBO D400 PC is ready for operation.
4.1 Encendido
- Ensure all external cables (power, monitor, peripherals) are securely connected.
- Flip the power switch on your PSU to the 'On' position.
- Press the power button on the front I/O panel of your case to start your system.
4.2 Using Front I/O Ports
El panel de E/S frontal proporciona acceso cómodo a varios puertos:
- USB3.2 Gen2 Type-C: Para transferencia de datos de alta velocidad con dispositivos compatibles.
- USB3.0: Para conectar dispositivos USB como unidades externas, teclados y ratones.
- AUDIO (2-in-1): For connecting headphones or headsets with a combined audio/microphone jack.
5. Mantenimiento
El mantenimiento regular ayuda a garantizar un rendimiento óptimo y la longevidad de los componentes de su PC.
5.1 Limpieza de los filtros de polvo
- The JONSBO D400 features a removable bottom dust filter.
- Periodically remove and clean the dust filter to prevent dust buildup and maintain good airflow.
- Use compressed air or a soft brush to remove dust.
5.2 Limpieza de superficies exteriores
- Wipe the exterior surfaces, including the glass panels, with a soft, lint-free cloth.
- For stubborn smudges on glass, use a mild glass cleaner applied to the cloth (not directly to the glass).
6. Solución de problemas
If you encounter issues with your JONSBO D400 PC case or its installed components, consider the following common troubleshooting steps:
6.1 Sin energía
- Ensure the PSU is switched on and the power cable is securely connected to both the PSU and the wall outlet.
- Verifique que el cable del botón de encendido del panel frontal esté conectado correctamente a la placa base.
6.2 Problemas de sobrecalentamiento
- Check that all installed fans are spinning and oriented correctly for optimal airflow (e.g., front/side intake, rear/top exhaust).
- Ensure CPU cooler and AIO radiators are properly seated and fans are functioning.
- Clean any dust filters and internal components to improve heat dissipation.
6.3 Problemas de ajuste de los componentes
- If a component does not fit, double-check its dimensions against the case specifications (GPU length ≤450mm, CPU cooler height ≤169mm, PSU length ≤200mm).
- Ensure proper alignment and removal of any necessary modular parts of the case during installation.
6.4 La E/S frontal no funciona
- Verify that all front I/O cables (USB, Audio) are correctly connected to their respective headers on the motherboard.
- Check your motherboard's manual for correct pin assignments.
7. Garantía y soporte
Política de devolución de 7.1
This product is subject to a 30-day return/replacement policy from the date of purchase. Please refer to your retailer's specific return terms and conditions.
7.2 Soporte técnico
For technical assistance or further inquiries, please visit the official JONSBO website or contact their customer support. Keep your proof of purchase handy when seeking support.
8. Demostraciones en vídeo
JONSBO D400 ATX PC Case Overview
Este vídeo ofrece una descripción completaview of the JONSBO D400 ATX PC case, showcasing its design, features, and internal layout. It highlights the aesthetic appeal and functional aspects of the case.


