1. Introducción
The Klarus P2 is a versatile tactical pen light designed for everyday carry (EDC) and various lighting needs. It features high lumen output, dual power options, and a durable, waterproof construction.

- Rendimiento alto: Delivers up to 1000 lumens with an 886-foot throw, utilizing an SFT-25R LED.
- Opciones de energía dual: Compatible with an included 1800mAh USB-C rechargeable battery or two standard AA batteries for emergency use.
- Diseño duradero: Crafted from aerospace-grade aluminum alloy, featuring IPX8 waterproof rating and 5ft (1.5m) drop resistance.
- Interfaz fácil de usar: Tactical tail switch for easy on/off and mode cycling with memory function.
- Compacto y portátil: Lightweight (3.22oz) and pen-sized (5.66 inches long) with a two-way detachable clip for versatile carrying.
2. Contenido del paquete
Verify that all items are present in your Klarus P2 package:
- Klarus P2 Tactical Pen Light
- 1800mAh USB-C Rechargeable Battery (LiR 14100)
- Cable de carga USB-C
- Detachable Pocket Clip (pre-installed)
- Acollador
- Juntas tóricas de repuesto
- Manual de usuario

3. Configuración
3.1 Instalación de la batería
- Desenrosque la tapa trasera de la linterna.
- Insert the included 1800mAh Li-ion battery with the positive (+) end facing towards the head of the flashlight.
- Alternatively, insert two AA alkaline or lithium-iron batteries with the positive (+) ends facing towards the head. Ensure total voltage does not exceed 3V when using AA batteries.
- Screw the tailcap back on securely to ensure waterproof sealing.

3.2 Carga de la batería
The included 1800mAh Li-ion battery has a built-in USB-C charging port. To charge:
- Retire la batería de la linterna.
- Connect the USB-C charging cable to the port on the battery.
- Conecte el otro extremo del cable a una fuente de alimentación USB.
- La luz indicadora de la batería mostrará el estado de carga (por ejemplo, rojo para cargando, verde para completamente cargada).
Note: The flashlight itself does not have an integrated charging port. The battery must be removed for charging.
4. Instrucciones de funcionamiento
4.1 Funcionamiento del interruptor de cola
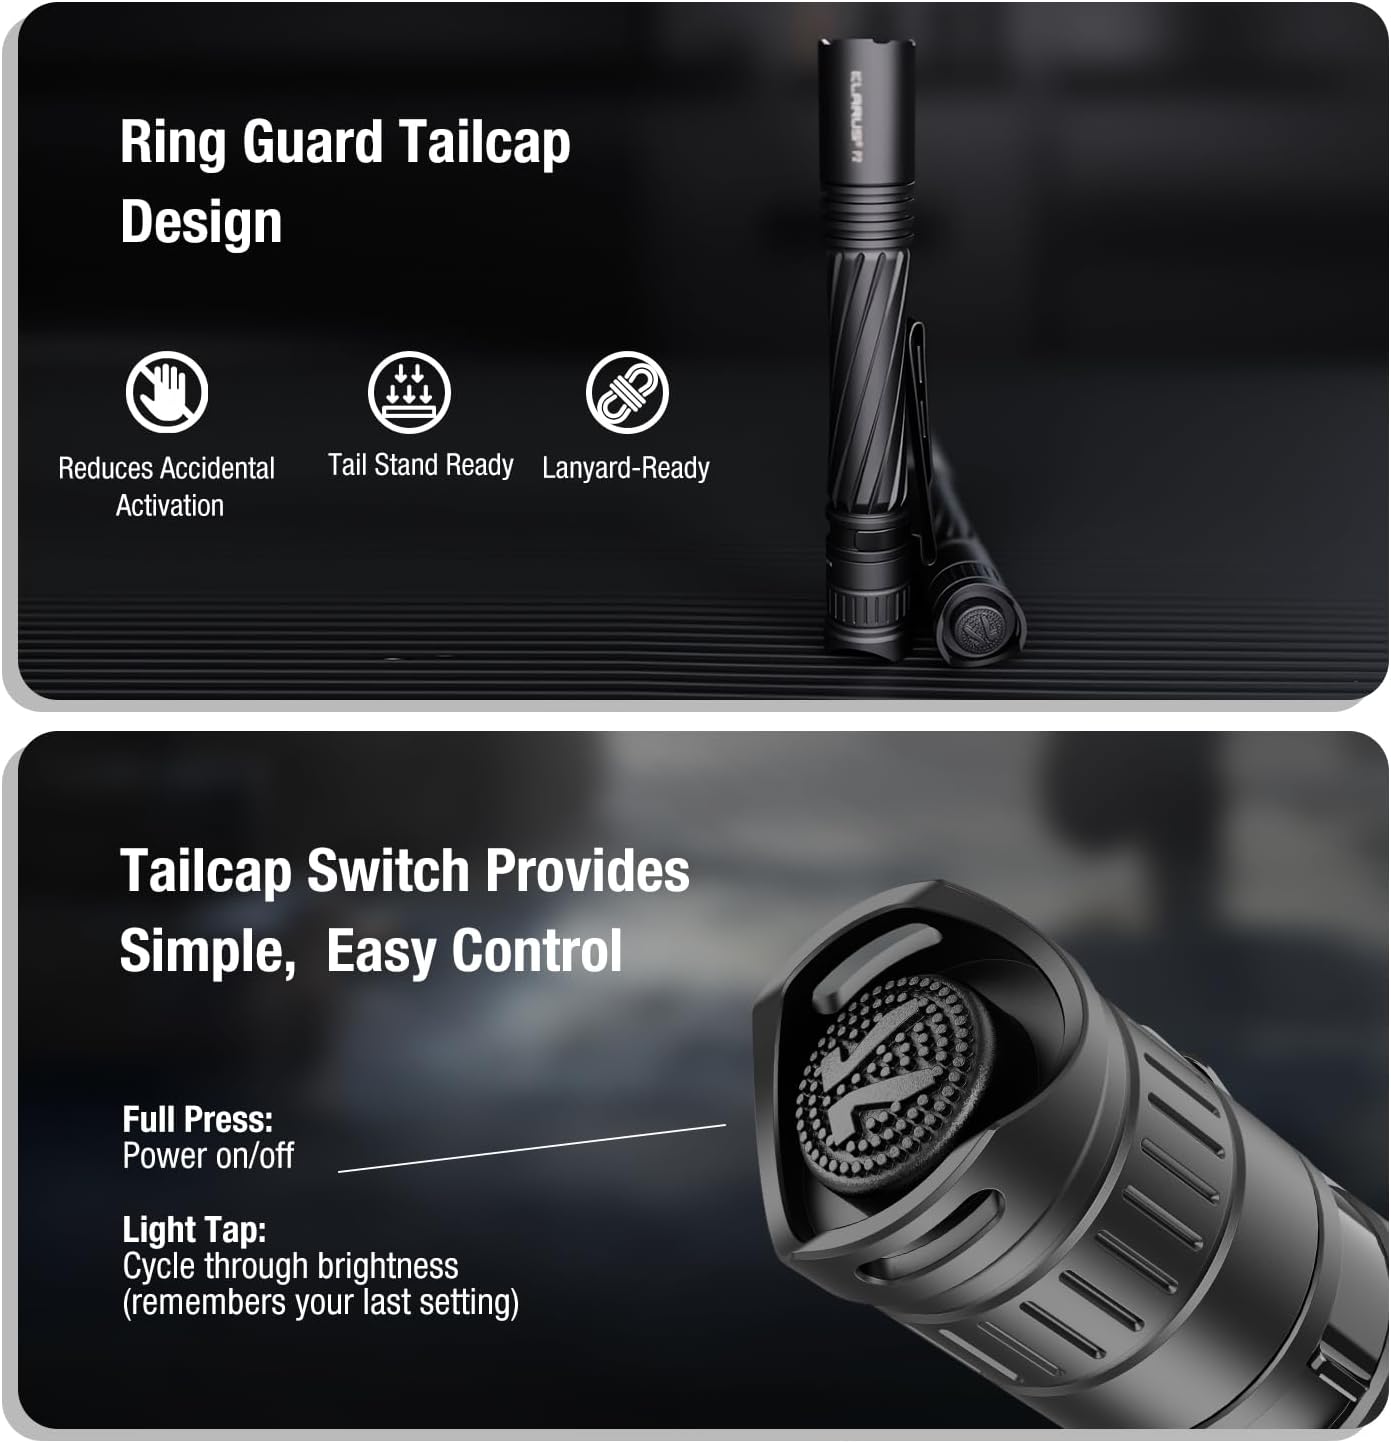
The Klarus P2 features a tactical tail switch for simple control:
- Prensa completa: Press the switch completely until it clicks to turn the flashlight ON or OFF.
- Light Tap: While the flashlight is ON, lightly tap the switch (without a full click) to cycle through the brightness modes (Low → Medium → High).
- Función de memoria: The flashlight will remember the last used brightness mode when turned off and will activate in that mode when turned back on.
4.2 Modos de brillo
The P2 offers three brightness levels:
- Bajo: Suitable for close-range tasks and extended runtime.
- Medio: Balanced output for general use.
- Alto: Maximum output for long-distance illumination and emergencies.
4.3 Carrying and Usage
The Klarus P2 is designed for versatile carry and use:
- Clip de bolsillo: The two-way detachable clip allows secure attachment to pockets, belts, backpack straps, or hat brims for hands-free lighting.
- Acollador: Attach the included lanyard to the tailcap for added security and easy retrieval.
- Tail-Standing: The grooved tailcap design enables the flashlight to stand upright, providing ambient lighting.


4.4 Video del producto
Watch the official product video for a demonstration of the Klarus P2's features and operation:
5. Mantenimiento
- Limpieza: Limpie el cuerpo de la linterna con un paño suave.amp tela. No utilice productos químicos agresivos ni abrasivos.
- Lubricación: Periodically lubricate the O-rings and threads with silicone grease to maintain waterproof integrity.
- O-ring Replacement: If O-rings are damaged or worn, replace them with the provided spare O-rings to ensure IPX8 waterproof performance.
- Cuidado de la batería: Store the rechargeable battery in a cool, dry place when not in use. If using AA batteries, remove them during prolonged storage to prevent leakage.

6. Solución de problemas
- La linterna no enciende:
- Ensure the battery is correctly inserted with the positive (+) end facing the head.
- Check if the battery is charged. Recharge the Li-ion battery or replace AA batteries.
- Apriete firmemente la tapa trasera.
- Operación intermitente:
- Limpie los contactos y las roscas de la batería con un paño limpio.
- Asegúrese de que la tapa trasera esté completamente apretada.
- Compruebe el nivel de carga de la batería.
- Reduced brightness or throw:
- The battery may be low. Recharge or replace.
- The lens may be dirty. Clean gently with a soft cloth.
7. Especificaciones
| Característica | Detalle |
|---|---|
| Modelo | P2 |
| Salida de luz (máx.) | 1000 lúmenes |
| Distancia del haz (máx.) | 886 pies (270 metros) |
| Fuente de poder | 1800mAh USB-C Rechargeable Li-ion Battery (included) or 2x AA Batteries |
| Tiempo de ejecución (máximo) | 20 hours (with 1800mAh battery) |
| Tipo de fuente de luz | SFT-25R LED |
| Material | Aleación de aluminio de grado aeroespacial |
| Nivel de resistencia al agua | IPX8 (impermeable) |
| Resistencia a caídas | 5 pies (1.5 metros) |
| Dimensiones del producto | 5.66" de profundidad x 0.8" de ancho x 0.8" de alto (143.8 mm x 20.7 mm x 20.7 mm) |
| Peso del artículo | 3.22 oz (91.3g) |
| Características especiales | High Lumen, Dual Power Options, Mil-Spec Tough, Tactical Tail Switch, Year-Long Standby |
8. Garantía y soporte
The Klarus P2 Tactical Pen Light is backed by an industry-leading Garantía de 5 años sin preocupaciones.
For any product inquiries, technical support, or warranty claims, please contact Klarus customer service through their official websitio o su punto de compra.


