1. Introducción
The ThermoPro TP210B is a wireless thermometer system designed to monitor temperatures in refrigerators and freezers. It provides real-time temperature readings from up to two remote sensors to a central receiver unit. This system features a 500 ft (150 m) wireless range, high accuracy, and customizable temperature alerts to help maintain optimal storage conditions for food and other temperature-sensitive items.
Las características principales incluyen:
- Alcance inalámbrico extendido: Up to 500 ft (150 m) using updated RF technology for stable connection.
- Pre-Paired for Immediate Use: No complex setup required; units are ready to operate upon powering on.
- Amplio rango de medición: Accurate readings from -40°F to 158°F (-40°C to 70°C).
- Smart Temperature Alerts: Customizable high/low temperature alarms on the receiver.
- Pantalla LCD retroiluminada: Clear display of current, maximum, and minimum temperatures, visible day or night.
- Rechargeable Transmitter: Transmitter uses a rechargeable lithium battery, suitable for low-temperature environments.
- Colocación flexible: Multiple mounting options for both receiver and transmitters.
2. Contenido del paquete
- 1 x unidad receptora
- 2 x Transmitter Units
- 2 pilas AAA (para el receptor)
- 1 x USB Charging Cable (for Transmitters)
- 1 x Manual de usuario
3. Diagrama del producto
Familiarize yourself with the components of your ThermoPro TP210B system:

Image: The main receiver unit with its large display and control buttons (MODE, UP, DOWN, HISTORY/CLEAR, LIGHT °F/°C), alongside two smaller transmitter units.
Unidad receptora:
- Pantalla LCD: Shows temperatures for both channels, Max/Min records, and battery status.
- Botón MODE: Cycles through settings and alarm modes.
- Botones ARRIBA/ABAJO: Adjust values in settings or alarm modes.
- HISTORY/CLEAR Button: Views and clears Max/Min temperature records.
- LIGHT °F/°C Button: Activates backlight and switches temperature units.
- Compartimento de la batería: Located on the back, for 2x AAA batteries.
Transmitter Units:
- Sensor de temperatura: Mide la temperatura ambiente.
- Indicador LED: Flashes to indicate data transmission.
- Botón de encendido: Enciende/apaga el transmisor.
- Puerto de carga: USB-C port for recharging the internal lithium battery.
4. Configuración
The ThermoPro TP210B units are pre-paired at the factory. Follow these steps for initial setup:
- Instalar las baterías del receptor: Open the battery compartment on the back of the receiver unit. Insert 2 AAA batteries, ensuring correct polarity (+/-). Close the compartment.
- Charge Transmitters: Connect the provided USB charging cable to the charging port on each transmitter unit and to a standard USB power source (e.g., phone charger, computer USB port). The LED indicator will show charging status. Charge fully before first use.
- Encender transmisores: Press and hold the power button on each transmitter unit until the LED indicator flashes.
- Verificar conexión: The receiver unit should automatically display temperature readings from both transmitters. If not, refer to the Troubleshooting section for re-pairing instructions.

Imagen: Un primer plano view illustrating the battery installation for the receiver unit and the USB charging process for a transmitter unit.
5. Instrucciones de funcionamiento
5.1 Visualización sobreview
The receiver's LCD displays the following information:

Image: The receiver's digital display, highlighting the current temperature readings for two channels, along with their respective maximum and minimum recorded temperatures and low battery indicators.
- Channel 1 Temperature: Typically for the refrigerator.
- Channel 2 Temperature: Typically for the freezer.
- Registros máximos/mínimos: Highest and lowest temperatures recorded since the last reset.
- Indicador de batería baja: Appears when receiver or transmitter batteries are low.
- Indicador de intensidad de la señal: Shows connection status to transmitters.
5.2 Selección de la unidad de temperatura (°F/°C)
Para cambiar entre Fahrenheit (°F) y Celsius (°C), presione el botón LIGHT °F/°C button on the receiver unit.
5.3 Configuración de alertas de temperatura
The system allows you to set custom high and low temperature limits for each channel. An audible and visual alarm will activate if the temperature exceeds these limits.
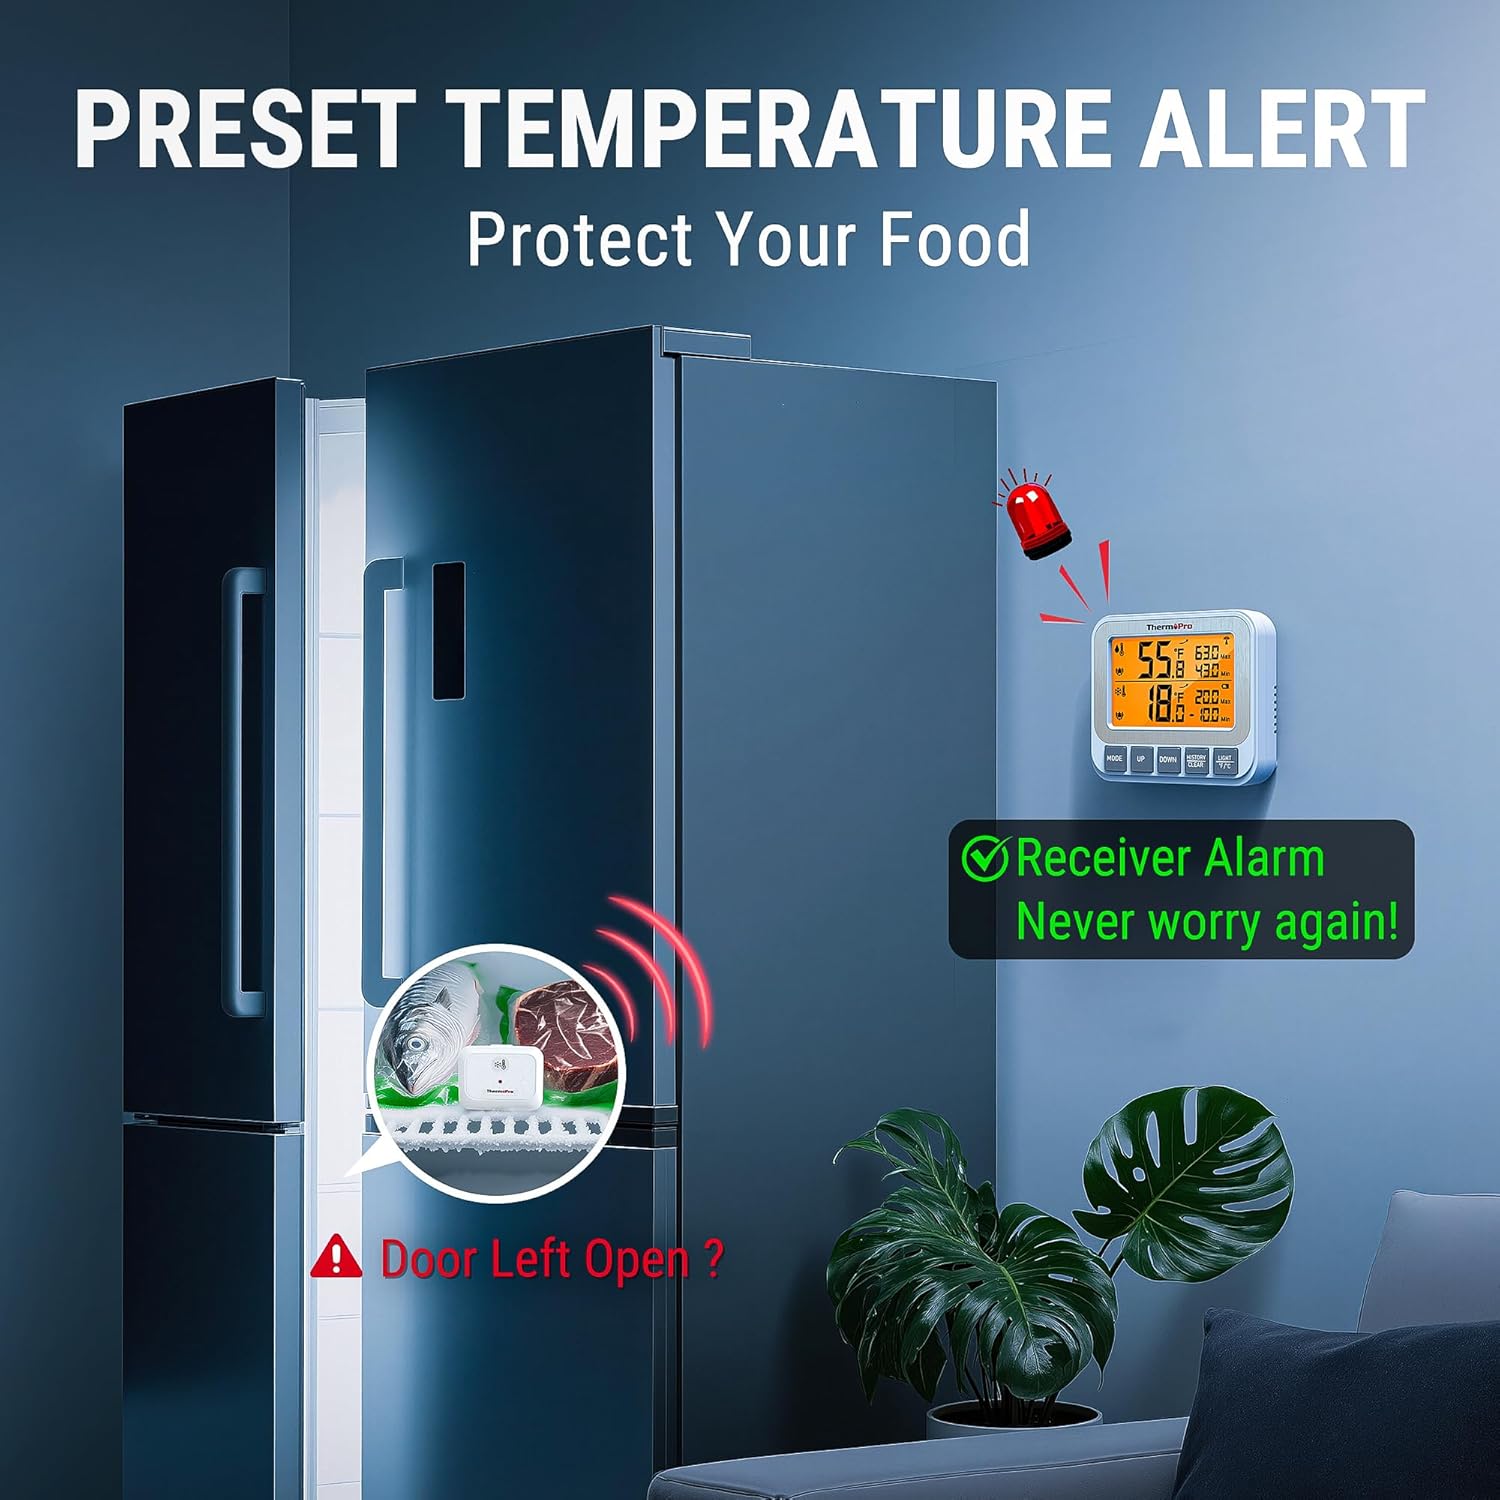
Image: The receiver unit showing an active alarm, with a visual representation of a refrigerator door left open and a transmitter inside, illustrating a scenario where a temperature alert would be triggered.
- Presione el MODO button once to enter the alarm setting mode for Channel 1 (refrigerator). The high limit will flash.
- Utilice el UP or ABAJO buttons to adjust the desired high temperature limit.
- Prensa MODO again to set the low limit for Channel 1. Adjust with UP or ABAJO.
- Prensa MODO a third time to enter the alarm setting mode for Channel 2 (freezer). Repeat steps 2 and 3 for Channel 2.
- Prensa MODO again to exit alarm setting mode. The alarm icon will appear next to the channel if an alarm is active.
5.4 Viewing and Clearing Max/Min Records
The receiver automatically records the maximum and minimum temperatures for each channel since the last reset.
- Presione el HISTORY/CLEAR botón una vez para view the maximum recorded temperatures for both channels.
- Prensa HISTORY/CLEAR De nuevo a view the minimum recorded temperatures for both channels.
- Para borrar los registros Máx./Mín., mantenga presionada la tecla HISTORY/CLEAR botón durante 3 segundos mientras viewing the records. The display will reset to current temperatures.
5.5 Pautas de colocación
La ubicación óptima garantiza lecturas precisas y una comunicación inalámbrica confiable.

Image: A visual guide demonstrating the versatility of the ThermoPro TP210B, showing the receiver magnetically attached to a fridge, standing on a table, and hanging from a hook, while transmitters are shown standing on a shelf and clipped to a rack inside a fridge.
- Colocación del receptor: The receiver can be placed on a countertop using its integrated stand, mounted magnetically to a metal surface (e.g., refrigerator exterior), or hung on a wall using the hanging hole. Position it within 500 ft (150 m) of the transmitters, minimizing obstructions.
- Ubicación del transmisor: Place transmitters inside the refrigerator and freezer compartments. They can stand on a shelf or clip onto a rack. Ensure they are not directly exposed to cold air vents or heating elements, which could affect accuracy.

Image: A diagram showing the wireless signal path from transmitters inside a refrigerator and freezer to a receiver unit located in another room, emphasizing the 500-foot range.
6. Mantenimiento
- Limpieza: Limpie las unidades con publicidadamp paño. No sumerja en agua ni use limpiadores abrasivos.
- Reemplazo de batería (receptor): When the low battery indicator appears for the receiver, replace the 2 AAA batteries.
- Carga del transmisor: When the low battery indicator appears for a transmitter, recharge it using the provided USB cable. A full charge ensures reliable operation, especially in low-temperature environments.
- Almacenamiento: If storing the device for an extended period, remove the AAA batteries from the receiver and ensure transmitters are fully charged before storage. Store in a dry, cool place.
7. Solución de problemas
- No Temperature Readings / Lost Connection:
- Ensure both the receiver and transmitters are powered on.
- Check battery levels for both units. Recharge or replace as needed.
- Move the receiver closer to the transmitters. Walls, metal appliances, and electronic devices can interfere with the wireless signal.
- Reemparejamiento: If connection is lost, try re-pairing. Power off all units. Power on the receiver. Then, power on each transmitter one by one. They should automatically reconnect.
- Lecturas inexactas:
- Ensure transmitters are not placed directly in front of cold air vents or near heat sources.
- Allow units to stabilize for 30 minutes after placement to get accurate readings.
- Compare readings with another known accurate thermometer if possible.
- La alarma no suena:
- Verify that the high/low temperature limits are set correctly for each channel.
- Ensure the alarm function is enabled (check for the alarm icon on the display).
8. Especificaciones
| Característica | Especificación |
|---|---|
| Número de modelo | TP210B |
| alcance inalámbrico | Hasta 500 pies (150 m) |
| Precisión de temperatura | ±0.9°F (±0.5°C) from 32°F-122°F (0°C-50°C), otherwise ±1.8°F (±1.0°C) |
| Rango de medición | -40 °F a 158 °F (-40 °C a 70 °C) |
| Potencia del receptor | 2 pilas AAA (incluidas) |
| Potencia del transmisor | Rechargeable Lithium Battery (charging cable included) |
| Mostrar | LCD retroiluminado |
9. Información de garantía
ThermoPro products are manufactured with high-quality materials and craftsmanship. This product is covered by a limited warranty against defects in materials and workmanship from the date of purchase. Please refer to the official ThermoPro websitio o comuníquese con el servicio de atención al cliente para conocer los términos y condiciones específicos de la garantía.
10. Soporte
For any questions, assistance, or troubleshooting not covered in this manual, please contact ThermoPro Customer Service:
- Websitio: Visit the official ThermoPro webSitio para preguntas frecuentes, registro de productos e información de contacto.
- Correo electrónico: Refer to your product packaging or the ThermoPro webSitio para la dirección de correo electrónico de atención al cliente.
- Teléfono: Contact the customer support hotline if available in your region.
Please have your model number (TP210B) and purchase date ready when contacting support.


