1. Introducción y másview
The SINOTIMER TM922 is a versatile dual-channel programmable digital timer switch designed for precise control of electrical equipment. It features two independent relay outputs, allowing simultaneous control of two separate devices or systems. With up to 8 ON/OFF programs per day and 15 combinations per week, this timer provides flexible scheduling options. Its accurate-to-the-second control ensures reliable operation according to preset programs, cycling weekly or daily from one second to 168 hours. Programs are saved by a battery backup in case of power failure, and the replaceable battery ensures long-term usage. The device is designed for DIN standard 35mm mounting, making it easy to install in DB boxes.
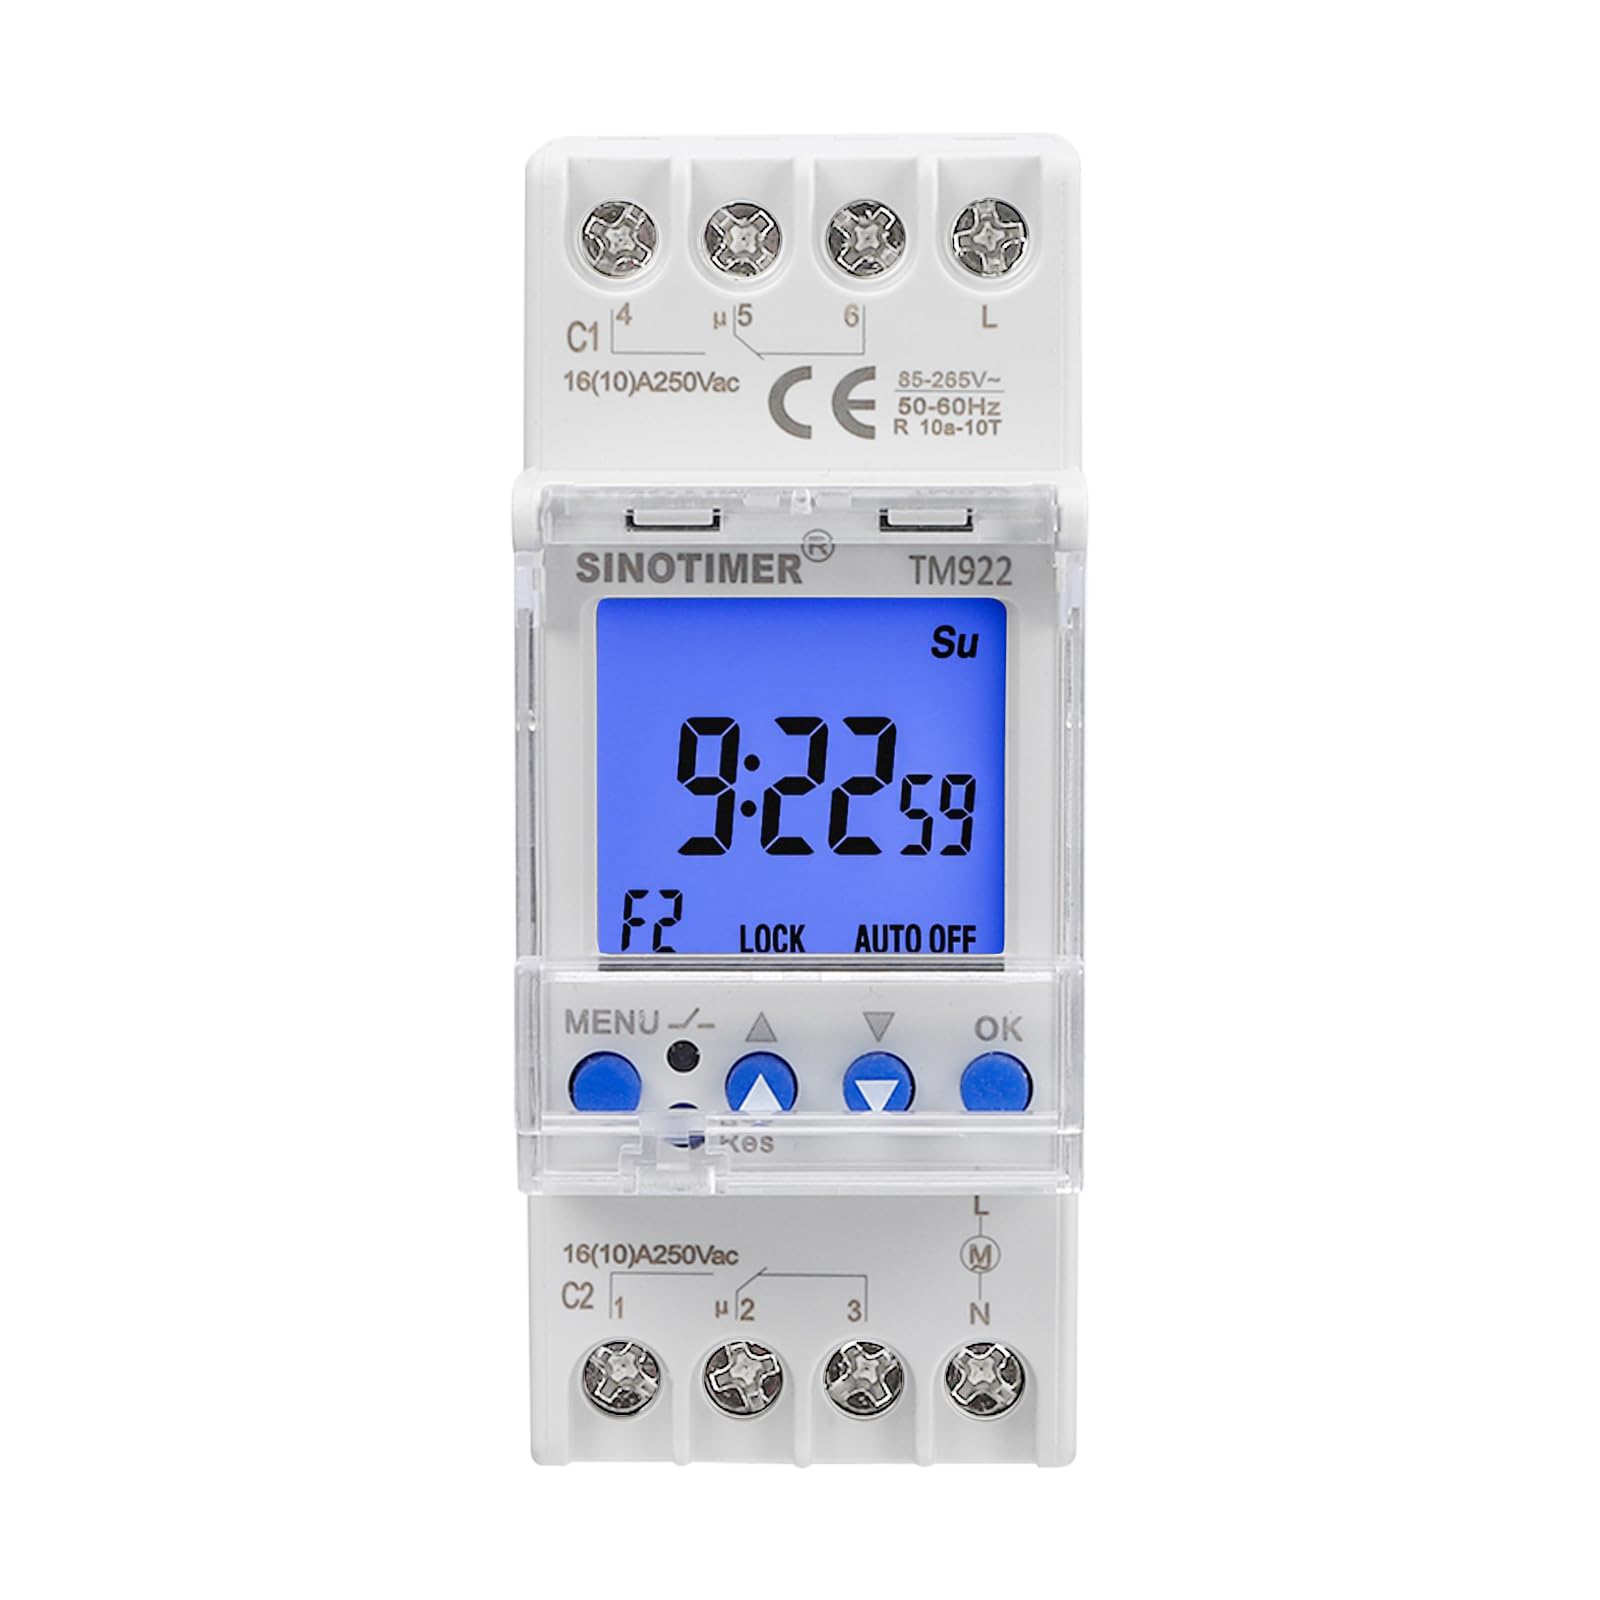
Figura 1: Frente view of the SINOTIMER TM922 Digital Timer Switch.
2. Información de seguridad
Please read all instructions carefully before installation and operation. Incorrect installation or use can lead to electric shock, fire, or damage to the device. Ensure power is disconnected before any wiring or maintenance. This device should be installed by a qualified electrician in accordance with local electrical codes. Do not expose the device to moisture or extreme temperatures. Keep out of reach of children.
3. Características del producto
- Dual Independent Relays: Two separate 16A outputs for controlling two distinct devices.
- Horarios programables: Up to 8 ON/OFF programs per day, with 15 weekly combinations.
- Sincronización precisa: Accurate to the second, with cycles from 1 second to 168 hours.
- Respaldo de memoria: Built-in battery saves programs during power outages.
- Batería reemplazable: Ensures long product life.
- Montaje en carril DIN: Standard 35mm design for easy installation in electrical panels.
- Gran pantalla LCD: Clear blue backlight for easy readability.

Figure 2: Close-up of the TM922's LCD display and control buttons.
4. Contenido del paquete
- SINOTIMER TM922 Digital Timer Switch
- One screwdriver
- Manual de usuario (este documento)
5. Especificaciones
| Atributo | Valor |
|---|---|
| Dimensiones del producto | 3.54 x 1.42 x 2.68 pulgadas |
| Peso del artículo | 5.9 onzas |
| Vol de entradatage | 85-265 V CA |
| Relés de salida | Two independent 16A outputs |
| Material | Plástico |
| Color | Blanco |
| Número de configuraciones | 23 (programs) |
6. Configuración e instalación
6.1 Montaje en carril DIN
The TM922 is designed for standard 35mm DIN rail mounting. To install, align the timer with the DIN rail and press firmly until it clicks into place. Ensure it is securely fastened.

Figura 3: Lado view que ilustra el mecanismo de montaje en riel DIN.
6.2 Diagrama de cableado
ADVERTENCIA: Disconnect all power before wiring. Wiring should be performed by a qualified professional.
The TM922 features terminals for power input (L, N) and two independent relay outputs (C1, C2). Each output has common (C), normally open (NO), and normally closed (NC) contacts. Refer to the labels on the device for precise terminal identification.
- Entrada de energía: Connect your 85-265VAC power supply to the 'L' (Live) and 'N' (Neutral) terminals.
- Channel 1 Output (C1): Connect your first load to the C1 terminals. For normally open operation, connect the load between the common (C1-4) and normally open (C1-5) terminals. For normally closed operation, connect between common (C1-4) and normally closed (C1-6) terminals.
- Channel 2 Output (C2): Connect your second load to the C2 terminals. For normally open operation, connect the load between the common (C2-1) and normally open (C2-2) terminals. For normally closed operation, connect between common (C2-1) and normally closed (C2-3) terminals.

Figure 4: Wiring terminals for power input and dual relay outputs.
7. Instrucciones de funcionamiento
7.1 Funciones de los botones

Figure 5: Control button functions for the TM922.
- MENÚ: Unlock/Lock buttons, Enter program settings.
- ▲ (Flecha hacia arriba): Increase value, Navigate up.
- ▼ (Flecha hacia abajo): Decrease value, Navigate down.
- Aceptar: Select, Confirm settings.
- Res (Restablecer): Channel selection, Sleep mode, Remove programs. (Requires a pointed object like a pen or the provided screwdriver).
7.2 Locking/Unlocking the Timer
To prevent accidental changes, the timer can be locked. Press and hold the MENÚ button for more than 3 seconds to lock or unlock the timer. The 'LOCK' indicator on the display will show the current status.
7.3 Configuración de la hora actual
- Ensure the timer is unlocked.
- Presione el OK button repeatedly to cycle through and select the minute, hour, second, and day of the week.
- Utilice el ▲ y ▼ buttons to adjust the selected number.
- Prensa OK para confirmar cada ajuste.
7.4 Manual Control (Working Status)
To manually override the programmed settings for a channel, press the MENÚ y ▲ buttons together. This will cycle the working status through: ON, ON AUTO, OFF, AUTO OFF. The current status will be displayed (e.g., F1 ON, F2 OFF).
7.5 Switching Channels (F1/F2)
To switch between Channel 1 (F1) and Channel 2 (F2) for programming or manual control, press the recessed Res button using a pointed object. The display will show 'F1' or 'F2' to indicate the active channel.
7.6 Programación de ciclos de encendido y apagado
The TM922 supports up to 8 ON/OFF programs for each channel (F1 and F2), totaling 16 ON/OFF events per channel. Each program can be set for specific days of the week.
- Ensure the timer is unlocked.
- Select the desired channel (F1 or F2) by pressing the Res botón.
- Presione el MENÚ button to enter the program setting mode. The display will show '1 ON' (for the first ON program).
- Prensa OK to select the time setting for '1 ON'. Use ▲ y ▼ to adjust the hour, minute, and second. Press OK después de cada ajuste.
- After setting the time, you can select the days of the week for this program. Use ▲ y ▼ to cycle through various day combinations (e.g., Mo Tu We Th Fr Sa Su, Mo-Fr, Sa Su, etc.). Press OK Para confirmar.
- The display will then show '1 OFF'. Repeat steps 4 and 5 to set the OFF time and days for the first program.
- Continuar presionando MENÚ to cycle through '2 ON', '2 OFF', up to '8 ON', '8 OFF' for the current channel, setting each as needed.
- Once all programs are set, press and hold MENÚ to exit programming mode and return to the main clock display.
Video 1: Official SINOTIMER guide on setting up the TM922's channels and programs.
8. Mantenimiento
8.1 Reemplazo de batería
The TM922 uses a replaceable battery to maintain program settings during power outages. If the display becomes dim or settings are frequently lost, the battery may need replacement. Refer to the device's internal compartment for battery type and replacement instructions. Ensure power is disconnected before replacing the battery.
8.2 Limpieza
Clean the device with a soft, dry cloth. Do not use abrasive cleaners or solvents, as these can damage the casing o pantalla.
9. Solución de problemas
- El temporizador no cambia:
- Check if the timer is in 'AUTO ON' or 'AUTO OFF' mode. Use manual control to switch to 'AUTO ON' for programmed operation.
- Verify that the ON/OFF programs are correctly set for the desired times and days.
- Asegúrese de que el dispositivo esté recibiendo energía.
- Configuración perdida después de un corte de energíatage:
- The internal backup battery may be depleted or faulty. Replace the battery.
- Botones que no responden:
- Ensure the timer is unlocked (press and hold MENU for 3 seconds).
- If the 'Res' button is stuck, gently try to release it. Avoid pressing too hard.
- La pantalla está oscura o en blanco:
- Compruebe la fuente de alimentación.
- Replace the internal backup battery.
10. Garantía y soporte
This SINOTIMER product comes with a standard manufacturer's warranty. For specific warranty details, please refer to the documentation included with your purchase or contact SINOTIMER customer support. For technical assistance, troubleshooting, or spare parts, please visit the official SINOTIMER webSitio web o contacte con el departamento de atención al cliente. Conserve el recibo de compra para reclamaciones de garantía.
Visita el Tienda SINOTIMER Para más información.


